

Astralevin
-
Posts
34 -
Joined
-
Last visited
Content Type
Profiles
Forums
Events
Everything posted by Astralevin
-
(FE12) Yet Another NM Hard No Reclass Draft (nothing to do)
Astralevin replied to GlitchWarrior's topic in Fire Emblem Drafts
C1: 4/21 For preps, I forged a +3 Mt, +7 Ht Steel Sword (-3850G) and named it "Manlyblade." I actually sent Arran to get the bullion. Training Luke paid off here since I was able to use him to KO a fighter on T1 and then KO 2 more on T1EP, allowing MU to move full speed towards the boss. Ryan only saw a little action on this map, he started things off by chipping a fighter for Marth, then he proceeded to move towards the cave thief who gets weakened by Arran's Iron Sword to get the kill (if I didn't care about feeding Ryan, Arran would just OHKO with Silver Lance). The staggler hunter also got killed by Ryan as Luke moved full speed ahead to attack a different hunter on T3 and to use the map save on T4. With the Manlyblade forge, a hit + crit (going off an 8% crit chance per hit and 82 displayed hit) is "all" I need to KO Lorenz allowing Marth to seize on T4. As a sidenote, killing Lorenz with Luke was not an option because he's not fast enough yet. C2: 6/27 During preps I sold the C1 bullion (5000G) and activated the first support convos with Luke and Ryan. Getting this one down took a few attempts, as usual, as enemy movement can get messy. Spd thresholds could also get annoying, as Marth and Luke had 11 Spd while cavs could roll 7 or 8. Despite the fact that I expect it to be useless, I still sent Arran to get the Ladyblade. Marth ignored the village to potentially get more EXP (didn't even test if that's true) and Catria recruited Warren for the free Steel Bow. MU did most of the work and Luke got a nice amount of EXP, which he needs since he's supposed to carry later. On T4 I had Marth bait the RHS draco and MU bait the boss, with the RHS draco going to Ryan and the boss going to Luke. Then MU baited the last draco which I fed to Luke. C3: 6/33 On T1 I positioned MU, Linde (equipped with Nosferatu to get an additional draco kill) and Luke to bait 4 dracos while Arran, Marth and Palla moved west. Then on T2 I fed a draco to each of Ryan, Luke and Linde while MU moved towards the bridge and Palla killed the thief for his Steel Sword, on EP a draco suicided on Linde while Luke baited the last 2 RHS dracos. T3 was when Marth reached the village, Arran took his Bridge Key while Luke and MU moved closer and Ryan and Linde took down dracos. Palla moved closer to the Master Seal. Arran then lowered the bridge on T4 allowing MU and Marth to advance closer to the boss, with most of the enemies cavs dying to MU's Iron Sword save for Matthis who survived on 1 HP. Matthis was also the only kill I managed to feed to Marth. On T5 MU moved in front of the boss equipped with the Manlyblade drinking a vul while Steel Sword!Arran took position to bait some dracos away from Palla, who obtained the Master Seal. Boss didn't get crit'd on T5EP so MU finished him on the next turn while Luke killed one of the dracos baited by Arran. Overall, I fed 7 dracos to my team with 3 going to Linde and 2 to Luke and Ryan. Had MU crit'd on T1EP or Luke on T2EP I guess I would've discounted that from Ryan since I'm still not sure of how much effort to put into him, but surely getting him to promotion can't be a bad thing. We'll see. C3x: 6/39 Activated the first support conversation with Arran. Promoted MU at level 12 to train axe rank, with Marth and co. getting EXP along the way. MU got a total of 4 axe battles so far. C4: 3/42 (1 Rescue, 4 uses left) Activated the first support convo with Marth and second convos with Luke and Ryan. On T1 Marth got Rescued by Yumina from a safe spot allowing him to full move to ORKO a hunter (hunter had to roll 8 Spd to allow Marth to double), Ogma recruited Sirius from the RHS tile and traded him the Steel Sword for Sirius's Iron, then Sirius ORKOed another hunter. MU fullmoved towards the NE direction to claim a kill while Ryan chipped the thief, Linde baited a barbarian with Thunder and Luke entered the range of a different barbarian to KO during EP, MU also killed a barb on EP. Marth's survival on T1EP is guaranteed, if he doesn't dodge he should vuln on T2. On T2 Marth fullmoves and KOes a pirate if healthy enough, Sirius follows Marth and kills the Steel Axe pirate while Ogma moves back to get healed by Yumina while covering her, allowing him to bait the pirates again to potentially get hurt again for more Yumina EXP. Yubello can actually bait one of the pirates too, so I have him do it since he's less dodgy than Ogma. On the LHS MU steps into range of the Devil Sword thief while Ryan KOes the barb, Linde can chip again if she didn't double, Luke moves south to bait the hunter. On T3 I have MU use the map save to allow Sirius to rig a crit @7% chance and 87 DH against the boss with the Steel Sword, after that Linde collects the remaining thief kill and Arran chips the hunter baited by Luke for Ryan to kill. Luke is already level 10 with good stats so I'm not worried about him getting a single kill here. Then Marth seizes. (Gonna change the stats sheet formatting a little bit) Unit Class Lv HP St Mg Sk Sp Lk Df Rs Wlv Statboosters Marth Lord 9.77 29 9 0 13 12 12 9 0 D Swd Donut Hero 12/1.91 35 17 2 21 19 8 14 3 B Swd E Axe Luke Cavalier 10.48 29 14 0 9 14 10 15 1 C Swd E Lnc Ryan Archer 7.30 23 10 0 8 8 4 9 0 C Bow Arran Paladin 3.60 26 10 1 12 11 4 10 6 D Swd B Lnc Linde Mage 7.48 22 0 4 8 11 10 2 4 D Tom Yumina Cleric 2.84 16 0 2 1 7 9 2 5 C Stf C5: 5/47 Activated the first support convo with Linde, sold the bullion from last map (+5000G) getting my funds to a little more than 15k. Then, after testing a little and tweaking with the deployment spaces, I realized that I would be able to get the Master Seal and the Physic staff, despite having no fliers, if I got Linde's Spd and/or Mag high enough to ORKO the mages in this map. I need her to be promoted for next map anyways so I decided to spend some money on some DG rounds for her, where she won 3 rounds with a streak (-1230G) using her Aura tome. I also decided to get her some Magic since she's been slacking a little there. In 2 levels she got 2 Mag, 1 Spd and even 1 very unexpected Def proc. With those stats and with Palla, Sirius and Ogma as guests deploys I can start the map. On T1 I have Linde KO Rickard to convoy drop the VIP Card (more like RIPcard) which is followed by Luke KOing the Thief that drops the Iron Sword, putting him just in range of one of the mages to bait that attack away from Arran, who takes position right above Luke. I also brought Ogma to recruit Barst, since I forgot to buy Hand Axes back in C1 I figured I'd want to get his. The rest moved staying out of enemy range. I also have Palla take the VIP Card from the convoy on this turn. T2, Arran moves ahead to OHKO the MS thief with Silver Lance and Linde kills a mage, especially if it's blocking Arran's way, Ryan on the other hand takes position in the edge of the range of one of the remaining mages. The rest move towards the boss area with Yumina healing Luke first for EXP and for his sake (heals Arran if the mage misses Luke). I actually used Palla and Sirius to block a few tiles so that Marth wouldn't get attacked by both mages as he barely got into the bridge, the mages will always prefer Ryan and Marth so nifty legal move here. Ogma and Barst stay out of range for the rest of the map. On EP things go as planned with Arran chipping the 2 cavs that attack him while Marth takes some damage and Ryan gets another mage on low HP, enemy bishop Physics a cav. On T3 Ryan finishes one of the mages, Linde finishes the dangerous Silver Sword cav (can use Nos if she took damage from mage), Arran starts moving towards the Physic bishop while drinking a vulnerary. In the southern area, Luke opens the way killing the Bridge armor with the Armorslayer which allows MU to KO the Stonehoist ballista with an Iron Axe. Marth moves ahead drinking a vuln while Sirius and Palla follow being careful to not take any damage on EP. Yumina heals Ryan. During EP MU clears an armor, a cav suicides on Linde and Marth and Ryan get targeted by the boss and a mage, respectively. Javelin Armor blocks the bridge. T4, Luke clears the way allowing Marth to get in range of the seize while MU KOes the boss with a Steel Sword for accuracy which he then convoy drops to equip his Iron Axe again for more rank. Arran takes position to get the Physic next turn while Linde comes to help Ryan, who also gets healed by Yumina for even more EXP, with the mage. Finally on T5 Arran gets the Physic, while the rest get a little more EXP, Palla buys the Master Seal with the RIPcard and Sirius buys 3 Door Keys before Marth seizes. C6: 4/51 (1 Rescue, 3 uses left) Activated Arran's second support convo. Trained Linde in the DG (-1040G) for 2 rounds for Mag and Spd before a level 11 promotion. Ryan also trained a round for Str/Spd (-400G). Aside from Linde, Luke also promoted at level 11. In terms of deployment I had to make Yumina sit this one out to deploy all the mounted fillers I need. Ryan actually ended up doing something of more value. This map can indeed be done in 4 turns with a sage, as I managed to see from logs in the past. By devoting MU alone to handle the LHS to get the Aquarius shard from Samto and a single unit to help Marth with chest pillaging (namely Ryan), I have just enough slots to fill with enough mounted units plus a sage for a pretty big Rescue boost needed to save a turn compared to only having a 5-mov healer available. Since I have Linde, I also don't really care about Yumina hitting level 10 soon since the former will also handle C11. On T1 I have Marth move 6 tiles towards the chests, he downs Pure Water as he would get KOed by Swarm + Elfire!mage otherwise, I also put Ryan right behind Marth to counter the mage equipped with a Steel Bow. MU takes the upper corridor equipped with Iron Axe where he will ORKO a bunch of enemies (the armor that will attack him with a Jav will cause another Jav armor IIRC and also a mage to suicide at 1-range). Rest go northeast. On EP the Swarm bishop decided to go for Arran and the Physic bishop healed the mage chunked by Ryan. I start T2 by having Gemini!Ryan finish the mage which allows Marth to go for the Barrier. On the upper room group, Luke (equipped with a Javelin) opens the door using one of the Door Keys from the previous map while Linde KOes the Swarm bishop with Aura so that our guests don't get harassed by him, the others move staying out of enemy range. MU attacks Javelin armor with Hand Axe to KO both him and the remaining mage on EP. T3, Marth gets the last chest while Ryan, relieved from his main task for the map, simply walks towards the map save. MU opens the door equipping Iron Axe and the rest walk. Luke and Arran have to stay out of enemy range because moving more than that would trigger undesirable enemy movement. On T4 I have MU use the LHS map save which is followed by undrafted mounts taking position to allow Linde to Rescue Marth 3 tiles to the left, then I have Arran KO one of the throne room armors with the Devil Sword. Ryan can then proceed to use the map save near the starting area to alleviate the fact that Luke has 59 Displayed Hit with the Armorslayer on Lang (but hey, it's a ORKO). Marth seizes after the general dies. C6x: 2/53 Gave Ryan a DG round for Str+Spd (-430G). On T1, Luke kills the armor on the bridge with a Steel Sword which is followed by Ryan taking Luke's weapon to disarm on EP, he also chips a fighter for a little EXP. Then, MU moves up and kills the RHS fighter (which puts him 2-range of the boss), Linde also moves up to finish the fighter (she also trades MU's Iron for a Hand Axe) chipped by Ryan and Marth takes the LHS bridge tile right besides Linde. Arran attacks the fighter on the bottom left corner bridge with a Steel Lance which allows him to get damaged for Yumina to get some EXP. Radd proves himself smarter than Caesar on EP after the latter suicides on MU, 2 archers also suicided on Linde. T2, I feed the boss to Linde while the rest mop up enemies and Yumina heals Arran again. C7: 5/58 Activated the 3rd support convos with Ryan and Luke, the 2nd convo with Linde and the 1st convo with Yumina. Deployed Sirius for shopping. Managed to get all treasure pretty consistently save for one of the two available Master Seals, only problem is that I need Navarre to proc Spd on his first level to not have to rely on crits. On T1 Navarre attacks the aggressive thief to his left from above, then Phina dances on him from the left and he finishes from the same spot (if he had crit'd I could've tried to get the extra MS). Luke and Marth begin moving around the LHS of the forest while MU fullmoves northwest to counter the fire dragon on EP with an Iron Axe, Arran moves to the right to bait a thief that will be fed to Ryan, Linde follows MU and Yumina heals Navarre with Physic. Sirius moves to the armory where he'll buy a Hand Axe for MU. T2, Navarre KOes the hunter that attacked him on EP and Phina dances for him outside of the range of the other hunters, allowing him to attack another aggressive thief from above (he doesn't need to crit) where he levels up. Marth and Luke keep moving around the forest, Linde finishes the dragon while MU moves 6 tiles above her to be a heal target next turn. Arran moves to the left unequipped to bait the thief that attacked him without killing, Yumina heals Navarre. On EP Phina gets attacked by the thief Navarre didn't finish while Navarre gets attacked by a hunter. T3, Marth keeps moving while Luke is able to KO the Angelic Robe thief, Navarre then KOes the hunter that attacked from the tile to the left of the map save, Phina then dances for Navarre allowing him to KO the last hunter in the forest. As for the rest, Ryan finishes the stray thief for EXP while Arran moves to retrieve the Physic staff from the cave, Linde heals MU (putting her in range of a cav reinforcement on EP) and MU moves north a little, just outside of the range of one of the 2 reinforcement armors. Yumina physics Phina so she can live the thief that will attack her on EP. The last aggressive thief in the forest suicides on Navarre on EP, EP reinforcements likewise suicide on MU and Linde. T4, Navarre uses map save to allow Marth to KO the Wo Dao thief with Devil Sword safely, then Phina dances for him so he can finish the thief that attacked Phina. MU KOes the STR mage that attacked Marth last EP, then Luke positions himself in front of the boss while KOing a conveniently positioned Master Seal thief. Linde KOes a reinforcement and Arran retrieves the Physic. Luke not hitting the boss on EP is most likely a reset since Phina is not in range to dance for him next turn though killing a thief for loot and trading the Killing Edge from Navarre then getting dance by Phina to critkill the boss with that on T5 can be attempted, wasn't needed in the successful attempt. Finally on T5 Luke KOes the Scorpio thief which is followed by Navarre taking the Scorpio to KO the bullion thief right besides (rolled 14 Spd instead of 13) and Phina dancing for Luke so he can finish the boss. Before Marth seizes, MU was supposed to chip Astram so Linde can finish for the Mercurius and the EXP but MU ended up critting him and then Linde got competitive and crit'd another hero I had her attack just in case (I want her to get EXP for C11 so MU critting Astram was probably a reset). Yumina also barriered someone before finishing the map. Unit Class Lv HP St Mg Sk Sp Lk Df Rs Wlv Statboosters Marth Lord 10.95 30 9 0 13 13 13 9 0 D Swd Donut Hero 12/5.26 38 19 2 24 22 11 17 3 B Swd D Axe Luke Paladin 11/3.27 36 19 1 12 16 11 18 7 C Swd D Lnc Ryan Archer 9.96 25 12 0 9 10 4 9 0 C Bow Arran Paladin 4.54 26 10 1 12 11 4 10 6 D Swd B Lnc Linde Sage 11/3.51 28 0 12 14 17 15 4 7 C Tom E Stf Yumina Cleric 5.42 18 0 2 2 8 12 3 7 C Stf Navarre Myrmidon 10.44 25 11 0 17 17 8 9 0 C Swd Phina Dancer 1.97 -
(FE12) Yet Another NM Hard No Reclass Draft (nothing to do)
Astralevin replied to GlitchWarrior's topic in Fire Emblem Drafts
Time to post logs. Also time to not be too original, as my MU build is also a Merc. Preset is Priest's Child, Beautiful and Recluse with the name ドーナツ (Donut). For the prologue pretty much all I have to do is to pull out my old strats from the previous NR draft since this is the same build. P1: 2/2 Attack soldier on T1, finish him during EP then attack Jagen to finish him during T2EP, likewise. Priest's Child preset makes this work provided Jagen only rolls 12 Atk. First level was HP/Str/Skl/Spd/Lck. P2: 2/4 MU can draw both Luke and Rody after Ryan takes the fort, he also has just about enough Str and bulk to finish them both on T2EP after drinking a vuln on T2PP. Level up was Str/Skl/Def. P3: 2/6 On T1, MU attacks the fighter to the left from the bush (he needs to dodge at least 1 axe hit @58 Displayed Hit for this clear to work) while Ryan stays put and Rody and Luke surround him, I also make sure to switch Luke and Rody's weapons around because this actually allows Luke to get more EXP. On T2, MU finishes the Merc, Ryan KOes Caeda and Rody+Luke team up to KO the last remaining fighter. MU level was HP/Str/Skl/Spd. P4-A: 2/8 Caeda+Ryan take out a soldier to open the way for MU to KO the archer while Luke positions himself of the other soldier, chipping him for EXP. On T1EP MU chunks Athena while the Merc and Myrm get ORKO'd (the Myrm can actually avoid getting doubled on rare high rolls, this doesn't affect the final outcome though). On T2 I feed Athena to Luke after Rody and Ryan or Caeda chip while the rest mop up the remaining enemies. Luke and Ryan got their first level ups here too. P5: 2/10 MU takes hold of a bush to the southeast of his starting position on T1 to KO a fighter, Athena positions herself to bait a hunter plus a thief while Luke positions himself to bait a barbarian and another hunter. Next turn, MU attacks the boss putting him in range to get KO'd next EP while the others mop up scrubs, Luke got the thief. For this to work, Mu has to dodge at least one axe attack out of 3, their accuracy numbers are something like 57, 48, 48. Not bad. Sometimes, the boss can roll enough Spd to avoid getting doubled by my MU and the thief can roll low enough Spd to get doubled by Athena but fortunately the rolls I need seem more common. P6-O: 2/12 On T1 I have Ryan + Merric chip the upper bridge fighter for Luke which is followed by Cecille trading a Steel Sword to MU who then proceeds to KO the archer. Caeda occupies the space right in front of the fighter in the lower bridge to weaken during EP. During T1EP, Luke barely survives a round of combat against Ogma while MU KOes the cav that attacks him. On T2, I feed Ogma to Luke and the last remaining fighter to MU. P7-C: 2/14 Deployed Caeda, Cecille, Luke, Ryan, Merric. T1, Caeda killed the upper archer, Merric + Cecille KOed the upper armor and MU fought the lower armor after Ryan chip, Luke followed Cecille around and blocked the myrm from attacking her on EP. MU's bulk was just about good about good enough to live 2 rouds of combat versus the armor, an archer and a myrmidon. On T2 I fed Cain to Luke, a myrm to Ryan and the last remaining archer to MU. P8: 3/17 Deployed Caeda, Luke, Ryan, Merric, Athena, Cain. Started by having Caeda and MU KO the archers while Cain was actually fast enough to KO the Silver Axe barbarian. On T1 I also fed thieves to Marth and Luke. Then on T1EP Caeda got KOed by a barb + mage combo, other mage weakened Cain heavily. On T2 I had Luke ORKO the mage that attacked Cain while MU OHKO'd the mage that KOed Caeda, putting him in range of Katarina, a thief and a thief reinforcement. Athena occupied a space next to MU to bait an attack away from him while Merric took position to bait the thief + reinforcement on the RHS. Cain also used the map save this turn. T2EP saw MU surviving Katarina + thief reinforcement on 1 HP, who got KOed by MU, while Merric weakened a thief and Athena baited. On T3, Merric weakened Katarina surviving on 1 HP to allow MU to exactly finish her with Steel Sword, as for the rest, thieves were fed to Marth, Luke and Cain. UNIT CLASS Lv HP Str Mag Skl Spd Lck Def Res WEXP Statboosters Marth Lord 7.24 27 8 0 11 11 10 8 0 D Swd Donut Mercenary 9.04 27 12 1 16 16 7 11 0 C Swd Luke Cavalier 6.00 25 11 0 8 11 7 12 0 D Swd E Lnc Ryan Archer 3.16 20 8 0 6 4 4 8 0 D Bow Arran Paladin 3.00 26 10 1 12 11 4 10 6 D Swd B Lnc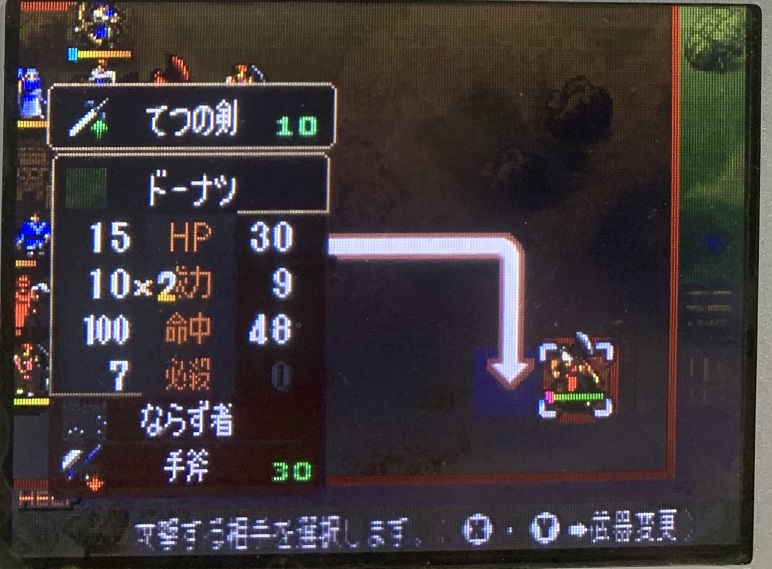
-
(FE12) Yet Another NM Hard No Reclass Draft (nothing to do)
Astralevin replied to GlitchWarrior's topic in Fire Emblem Drafts
I asked random.org and it said to draft Astram so that's exactly what I'm gonna do. @PaulDogg -
(FE12) Yet Another NM Hard No Reclass Draft (nothing to do)
Astralevin replied to GlitchWarrior's topic in Fire Emblem Drafts
Roshea @GlitchWarrior -
(FE12) Yet Another NM Hard No Reclass Draft (nothing to do)
Astralevin replied to GlitchWarrior's topic in Fire Emblem Drafts
Macellan @PaulDogg -
(FE12) Yet Another NM Hard No Reclass Draft (nothing to do)
Astralevin replied to GlitchWarrior's topic in Fire Emblem Drafts
Abel @GlitchWarrior -
(FE12) Yet Another NM Hard No Reclass Draft (nothing to do)
Astralevin replied to GlitchWarrior's topic in Fire Emblem Drafts
Nagi @PaulDogg -
(FE12) Yet Another NM Hard No Reclass Draft (nothing to do)
Astralevin replied to GlitchWarrior's topic in Fire Emblem Drafts
Athena @GlitchWarrior -
(FE12) Yet Another NM Hard No Reclass Draft (nothing to do)
Astralevin replied to GlitchWarrior's topic in Fire Emblem Drafts
Ryan @PaulDogg -
(FE12) Yet Another NM Hard No Reclass Draft (nothing to do)
Astralevin replied to GlitchWarrior's topic in Fire Emblem Drafts
I think Navarre will give an edge to this team, so I will gladly take him. @GlitchWarrior -
(FE12) Yet Another NM Hard No Reclass Draft (nothing to do)
Astralevin replied to GlitchWarrior's topic in Fire Emblem Drafts
Reiden/Leiden @PaulDogg -
(FE12) Yet Another NM Hard No Reclass Draft (nothing to do)
Astralevin replied to GlitchWarrior's topic in Fire Emblem Drafts
Cain @GlitchWarrior -
(FE12) Yet Another NM Hard No Reclass Draft (nothing to do)
Astralevin replied to GlitchWarrior's topic in Fire Emblem Drafts
Gimme Linde. @PaulDogg Now that I think about it, archers are the only ones who can't forge their basic weapons. I hope this isn't too late to make this suggestion but I think that maybe we could discuss allowing some level of mt-forging for bows, up to +2 mt doesn't sound too crazy. Or just up to +1. Thoughts? -
(FE12) Yet Another NM Hard No Reclass Draft (nothing to do)
Astralevin replied to GlitchWarrior's topic in Fire Emblem Drafts
Let's go with Luke @GlitchWarrior -
(FE12) Yet Another NM Hard No Reclass Draft (nothing to do)
Astralevin replied to GlitchWarrior's topic in Fire Emblem Drafts
Yumina. Again? Yeah, staves important. edit: forgot to tag @PaulDogg -
(FE12) Yet Another NM Hard No Reclass Draft (nothing to do)
Astralevin replied to GlitchWarrior's topic in Fire Emblem Drafts
I agree with snake draft. -
(FE12) Yet Another NM Hard No Reclass Draft (nothing to do)
Astralevin replied to GlitchWarrior's topic in Fire Emblem Drafts
I haven’t even finished my other draft but I’ll join anyway. -
(FE12) New Mystery Hard no reclass draft
Astralevin replied to NightKnight77's topic in Fire Emblem Drafts
C6 5/53 turns (1 rescue) Before starting the map, Cecil got a 3 round streak in the DG (-1930G) to get two level ups before promoting to paladin, putting my funds at 460G. Caeda on the other hand got promoted immediately. For this map, I deployed Sirius, Luke and Rody for Rescue boosting purposes. On T1, Marth goes full mov towards the chests, Gemini!Arran one-shots the mage in the chest room using the Devil Sword or Silver Lance (depending on Def roll), MU moves to the LHS with an iron axe to take out the steel lance armors, the rest move northeast. On T2, Marth starts opening the chests while Cecil opens the door with a javelin equipped and Caeda kills the Swarm Bishop with Arran moving to reunite with this group. MU moves towards the LHS door equipping a hand axe after reaching D axes in the previous turn and drinks a vulnerary to heal off the damage inflicted by the enemy mage, others keep moving. T3 Caeda kills the Secret Book Bishop because she can still reach the boss by T5 while Cecil, Arran and Yumina (along with undrafted mounts) move towards the throne room without triggering enemies yet. Yumina also physics for EXP, Norne and Frey move a little to not get attacked by reinforcements and MU opens the door to get the Aquarius. On T4, I position Cecil in a corner to trigger the enemies, just outside of the leftmost Bishop's range, after taking pure water with the javelin still equipped to take out the other Bishop. The rest get into position, except Marth who just waits. On T5, depending on how enemies moved or wether or not Cecil gets crits, I have Cecil, Arran and even MU if he can barely reach something make way for Marth who gets rescued by Yumina after the undrafted mounts take their positions. Caeda gets a pretty close ORKO without shards (the Taurus was on Cecil) using the Wing Spear which allows Marth to exactly reach the throne. C6x 2/55 turns Made my way through the middle after Caeda KOed the armor, positioning MU in range of the boss with a hand axe. Arran blocked the south bridge unequipped, Marth occupied the eastern bridge, Cecil took out the enemy in front of the western bridge and thus blocked together with MU and Yumina healed something with physic for EXP. On EP, Marh countered a fighter without killing, an archer attacked Yumina, another archer missed Caeda (not needed), the boss was taken to very low HP after attacking MU. On T2, Yumina physics for EXP again, MU KOes the enemy blocking Marth, Caeda finishes the boss with an iron lance and Cecil gets a little bit of EXP before the seize. C7 5/60 Originally, I had considered the possibility of visiting the armory in this map with an undrafted unit to buy a new hand axe but when I remembered this I was already too deep into this map (Caeda even got Str!) without having deployed said unit, so I decided to press on. Navarre getting lucky with crits is likely needed to get an extra Master Seal (which will probably just translate into funds since I already bought the one in C5) and that is exactly what ended up happening here, with him critting both the aggressive thief and the MS thief on T1. On that same turn, Caeda moved all the way north, Marth moved northeast to get through the forest, Arran baited the southernmost aggressive thief so Marth can get the EXP next turn while MU, Cecil and Radd started the "get the physic staff operation" with MU positioning himself to counter the FDragon with an iron axe. In the following turns, Caeda took care of a bunch of enemies and the boss with the help of Phina (with all the enemies getting one-rounded by iron lance), Navarre helped thanks to getting a Spd proc that allows him to double thieves, Marth made his way to seize. On the left hand side, Radd moved to get the physic staff from the cave, Cecil got the dragon kill and MU simply moved north to fight later. Yumina simply provided needed (and also unneeded) heals via physic for EXP for the entire duration of the map. On T4, Navarre used a map save to allow Marth to kill the Scorpio thief using the Devil Sword after a dance. Meanwhile, Caeda kills another thief, Cecil stays out of range of the Ridersbane armor reinforcement and MU moves closer to Astram. I moved Arran closer to this group because I thought I'd need him for something but it turns out that I could've used him to buy a hand axe instead, after I saved it was too late for him to reach anyways. On the last turn, Phina danced again for Marth to overcome terrain and reach the castle, Caeda killed the last thief and Ogier had a showdown against Astram, "The Strongest Man in Archanea", and proved superior to him and his Mercurius wielding the power of Durandal. C8 4/64 turns Before starting the map, I sold the Bullion (S) (+5000G) and Firestone (+1400G) for funds. Pretty simple map honestly, due to being unable to reclass Gordin to cav Jeorge simply always costs a turn so I decide to use the dead time to scoop EXP since I want to get him anyways. On T1 Caeda recruits Roger, he moves away from enemies and Marth positions himself next to Caeda after a dance while wielding the Rapier and a bunch of star shards to improve his combat vs the paladins: Scorpio, Cancer, Libra. MU kills the Leo thief and then moves up to fight generals. On the last turn, I manage to feed a general to Jeorge and get the Arms Scroll, MU is also getting close to C axes which is nice. C9 5/69 turns (1 rescue) Before starting the map, I got a skill bond from Arran's support chain. Palla and Catria were deployed for additional help (shopping and potentially rescue boosting). T1 Caeda gets the thief staff and sends it to convoy to allow Yumina to get the boots, which she sends to the convoy. Marth (who uses the boots) and Phina move towards the chests while Jeorge crosses the river using the Parthia as a pure water, Cecil positions herself to counterkill the closest draco and the rest get into positon. T2 Yumina uses Barrier on Cecil who then moves in range of 2 other dracos and a few mages while drinking a vulnerary, Caeda moves to the left and uses a pure water and Jeorge one-shots a different draco with silver bow while MU moves to pursuit the Master Seal thief, this also allows him to counterkill a mage that would otherwise attack Jeorge at melee. T3, Arran and LevinSword!Radd finish the dracos weakened by Javelin!Cecil if needed which is followed by Scorpio!Jeorge ORKOing Etzel, Yumina heals Jeorge and Caeda javelins another mage to get into range of the boss. In the meantime, Marth (who has gotten the chests) gets danced to head towards the village. On T4 Caeda takes out the Speedwing Bishop with a javelin which she then sends to convoy to equip a steel lance against the boss while Palla gets into position to visit the pure water shop the following turns, which puts her in range of a swarm but this is fine because Arran will bait it, Marth reaches the village, MU finally gets an unnecessary Master Seal and the rest get into position. On the final turn, Caeda gets the Mend drop, Palla shops for 2 Pure Waters and Yumina rescues Marth to allow him to seize after positioning other units to rescue boost (needed because I'm using a 5 mov rescuer). UNIT CLASS LVL HP ST MG SK SP LC DF RS WEXP Marth Lord 13.06 32 15 0 15 16 12 13 0 C Swd Ogier Mercenary 13/6.32 38 20 3 25 26 11 18 3 B Swd D Axe Cecil Cavalier 13/4.64 31 18 3 21 20 11 13 9 C Swd D Lnc Yumina Cleric 9.78 19 0 6 4 13 16 4 6 C Stf Caeda PKnight 10/6.26 30 16 1 18 23 24 16 5 C Lnc Phina Dancer 2.87 dancer Jeorge Sniper --/5.93 32 12 1 14 14 5 13 3 A Bow Arran Paladin --/4.68 26 10 1 12 11 4 10 6 D Swd B Lnc Radd Myrmidon 6.24 23 5 0 10 13 2 5 0 C Swd C10 2/71 turns Before starting the map, I got a speed bond from Cecil's support chain. I also gave Jeorge a round in the DG (-680G) for Spd (I'll probably never need this but let's see). MU and Jeorge each killed a bishop, Marth took a shot at the merc with levin sword and Caeda finished, Marth moved to the other side after a dance where he will survive thanks to Jeorge baiting the Shaver!Mage that moves first. Merric unequips to the left of Arlen. Yumina got the bullion and Cecil went right for EXP and the elfire drop. Next turn, Jeorge took out the sniper to get the killing edge after being mended by Yumina, MU took out the mage blocking Marth's way, Cecil killed something and Caeda weakened Arlen with a javelin to feed Merric before seizing. C10x 1/72 turns Brought Malice to feed her some EXP, she and Marth each got a kill after Cecil and MU weakened, Yumina used barrier and Phina danced for Caeda who ORKOed Roro with silver lance. C11 6/78 turns (1 rescue) Before starting the map the Bullion (L) from C10 was sold and then I proceeded to train Malice in the DG, getting a 3-round streak (-1770G) for 2 level ups before getting promoted while Caeda also got a round for Str and Def (-1080G). With this team I manage to get all the hidden treasure minus the Lady Sword, Elysian Whip and Goddess Icon. Cecil, Malice, Jeorge and Marth move north to get EXP and treasure and to make way for undrafted Minerva to visit the Secret Shop. Initially, Cecil counters a Wyvern that's supposed to be fed to Marth while Malice (headed for the Dracoshield) just moves north equipped with a Levin Sword, Aquarius, Gemini and a vulnerary to chip wyverns that also go to Marth while Jeorge assits against barbarians and the occasional high rolling wyvern that Malice can't double with iron bow chip. Cecil then starts moving towards the northwest because she has to get the Arms Scroll and because I need to remove the wyvern around the shop for Minerva anyways. MU goes westwards solo because he's not good at feeding Marth, he gets to train his axe rank some more and he can also reach the Speedwing (who should get this anyways? Belf? Jeorge? Yumina for some crazy nos strats?). Meanwhile, Yumina, Caeda and undrafted Palla head towards the seize point. Merric positions himself to counterkill a wyvern on T1, with a vulnerary and physic from Yumina he can position himself to kill yet another wyvern on the next turn, which also gives Yumina enough EXP to get a last level before promoting. Phina dances Yumina who then promotes while taking a safe path after getting the Spirit Dust on turn 1. Caeda on the other hand positions herself in range of a couple wyverns on T2 (getting the Robe) to ORKO them, with the vulnerary she's carrying she doesn't even strictly need physic support from Yumina thanks to shards and because her Def is actually really good at this point. After boosting Yumina's movement earlier, Phina starts supporting Cecil and also Merric. Caeda is able to get the secret book which is followed by her KOing the hunter near the boss without even triggering the killer weapon enemies (good AI) which is then followed by Caeda positioning herself in front of the boss with a silver lance as she heals with a vuln on T5. On that same turn, Yumina has to position herself in range of the killer weapon enemies which she can KO with Nosferatu thanks to Capricorn and Scorpio. Jeorge used a map save on T4 to make this less risky. On T6 I finish getting treasure, Minerva buys 2 Wyrmslayers and 2 Dragonpikes, Caeda moves south of the Master Sword SM to get the Energy Drop (then I realize that with a physic earlier she would've been able to get the Master Sword but I think she still risked dying to a crit so I'm not redoing this) and Yumina rescues Marth in range of the castle thanks to Palla blocking a tile to rescue boost.
-
(FE12) New Mystery Hard no reclass draft
Astralevin replied to NightKnight77's topic in Fire Emblem Drafts
May the better merc receive the second hero crest. C1 4/22 turns Marth dashed to the throne, Arran dashed towards the enemies, MU got like 1 or 2 kills (had to share with Marth) plus the boss, Cecil took out the hunter on T1 and then fought fighters and the reinforcement thief to self-improve. Didn't buy anything. Bosskill involved Arran standing in front of the boss after a vuln on T3, hitting an 80%, and then MU getting a hit + crit with steel sword on the next turn (at 71 hit, 8 crit). With a +1 mt forge only a single crit would've been needed, forging hit could also help with reliability but eh. Cecil's 2 Def procs proved pretty convenient since they barely allowed her to survive 2 fighters on T1EP provided that one of them rolls the lower Str value (very common, so whatever). Annoyingly, I had to miss the cave bullion. C2 6/28 turns Recruited the recruitables for their items, got the Lady Sword with Arran. The boss was baited on T4, MU got 2 generic dracos while Cecil got the boss EXP after MU doubled during previous EP. Marth leveled up from killing a few cavs. C3 6/34 turns Forged a +2 Mt, +4 Hit steel sword (-2100G) and named it "Durandal," this forge was made for killing the boss of this map with a hit + crit after map save. I played this in such a way that Marth didn't manage to kill anything (Cecil critting Matthis might have mattered, I think she was supposed to leave him at 1 HP with steel sword) but I did manage to feed a lot of EXP to MU and Cecil, with both leveling up twice. Cecil dealt with the 2 closest dracos from the starting area while Marth, MU and Arran moved west, Arran took the bridge key from Marth T3 and used it the following turn to open the way to the seize point, Cecil also joined with the rest. T4EP MU took care of the non-Matthis cavs with an iron sword, then he positioned himself to fight the boss on T6. Palla got the Master Seal and silver lance, she was guaranteed to live if Cecil didn't proc Def since I had Palla attack the MS draco on T5 (this triggers the rest of the dracos over the mountains) and I also position Cecil in range of a single draco to divert him and to get more EXP on her. If Cecil procs Def she can't bait (spoiler: she didn't in the successful attempt) but Palla can still live if a good number of dracos lowroll Str or if she simply dodges something. I might need her to shop someday so it's better this way I think. C3x 6/40 turns MU promoted at level 13, brought an iron axe to rank grind, Marth got as much EXP as possible. C4 3/43 turns (1 rescue) Pretty standard, MU got most of the enemies north of the starting area and he also got the Devil Sword after Arran baited the thief, Cecil got the Armorslayer, Yumina rescued and healed to almost get a full level. Bosskill was a Sirius crit. C5 5/48 turns Sold the bullion from last map and forged a +3 Mt, +10 Hit Javelin (-3750G) and named it "Wimp Spear" to allow Caeda to ORKO mages. Trained Caeda in the DG for 2 rounds with a strak (-1360G) where she got Str/Skl/Spd/Lck. For the map, I deployed Sirius to visit the Secret Shop. Caeda (who kills Rickard on T1 and takes out a couple mages during EP, also sends the VIP Card for Sirius to take from Marth) and Arran head northwest while Yumina heals them whenever possible and Marth, Ogier, Cecil and Sirius move towards the castle area. MU and Cecil (who can use the armorslayer at this point) ORKO armors to clear the way for Marth while Sirius follows the group while staying out of enemy range. Then, Arran gets the Master Seal while Caeda fights cavs with the Wing Spear. On T4 MU takes out the boss with a Steel Sword and then sends it to convoy to equip an iron axe to get more WEXP against the cavs in the area. On the last turn, Caeda gets the physic, Sirius buys the SS Master Seal and Cecil buys 3 door keys. UNIT CLASS LVL HP ST MG SK SP LC DF RS WEXP Marth Lord 10.08 30 12 0 13 13 11 10 0 D Swd Ogier Mercenary 13/3.27 35 18 3 22 24 10 16 3 B Swd E Axe Arran Paladin --/4.18 26 10 1 12 11 4 10 6 D Swd B Lnc Cecil Cavalier 11.48 23 12 2 13 15 8 10 2 C Swd E Lnc Yumina Cleric 3.35 16 0 3 2 7 10 2 5 C Staff Caeda PKnight 10.27 22 9 2 13 20 19 9 8 D Lnc -
(FE12) New Mystery Hard no reclass draft
Astralevin replied to NightKnight77's topic in Fire Emblem Drafts
Pretty neat, not gonna lie. Goddamn, an FE6 reference? I already did the same thing but with Ogier instead. And I started this around round 5... Oh well, in that case I'll show Ogier's (MU) build. Mercenary obviously, preset is Priest's Child / Beauty / Recluse. This is how his bases look: Preface: after a pretty unsuccessful stint as a mercenary in Elibe, Ogier decided to seek glory elsewhere. His travels led him to Altea, where he enrolled for a pretty interesting job: becoming a knight for the Altean king himself. Will Ogier's persistance allow him to become a mercenary of great renown (or at least more renown than he had in Elibe)? Will he be able to earn a lot of gold to help his family? Let's find out. P1 2/2 turns P2 2/4 turns P3 2/6 turns P4 2/8 turns P5 2/10 turns P6 2/12 turns P7 3/15 turns P8 3/18 turns Now, to post team stats before starting C1 (let's see if I can figure out how to do this correctly...) UNIT CLASS LVL HP ST MG SK SP LC DF RS WEXP Marth Lord 7.17 27 9 0 10 11 10 9 0 D Swd Ogier Mercenary 9.53 25 13 1 17 18 7 10 0 C Swd Arran Paladin --/3.00 26 10 1 12 11 4 10 6 D Swd B Lnc Cecil Cavalier 5.10 20 8 0 10 11 6 7 0 D Swd E Lnc


-
(FE12) New Mystery Hard no reclass draft
Astralevin replied to NightKnight77's topic in Fire Emblem Drafts
Biraku (Vyland) for the memes @Eltosian Kadath -
(FE12) New Mystery Hard no reclass draft
Astralevin replied to NightKnight77's topic in Fire Emblem Drafts
Badd. Honestly, we could random.org all the next picks and it wouldn't make a difference, methinks. @NightKnight77 -
(FE12) New Mystery Hard no reclass draft
Astralevin replied to NightKnight77's topic in Fire Emblem Drafts
You know, under the conditions of this run maybe Michalis won't cost a turn, his stats might also be nice. If he ends up costing a turn eh, maybe I'll skip him. Maybe not. Anyway, @Eltosian Kadath is next. -
(FE12) New Mystery Hard no reclass draft
Astralevin replied to NightKnight77's topic in Fire Emblem Drafts
Ymir might be able to shoot something down, I don't know. @NightKnight77 -
(FE12) New Mystery Hard no reclass draft
Astralevin replied to NightKnight77's topic in Fire Emblem Drafts
Macellan to OPEN A DOOR @Eltosian Kadath


