

FionordeQuester
-
Posts
2,641 -
Joined
-
Last visited
Content Type
Profiles
Forums
Events
Posts posted by FionordeQuester
-
-
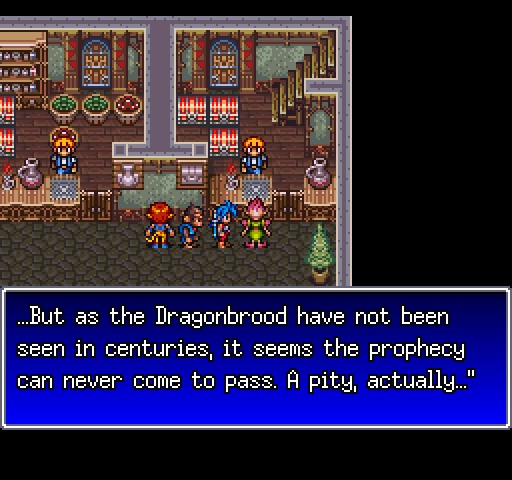
Part 27: Breath of Fire II Walkthrough—Approach (Attack on Evrai, Part 2/2)
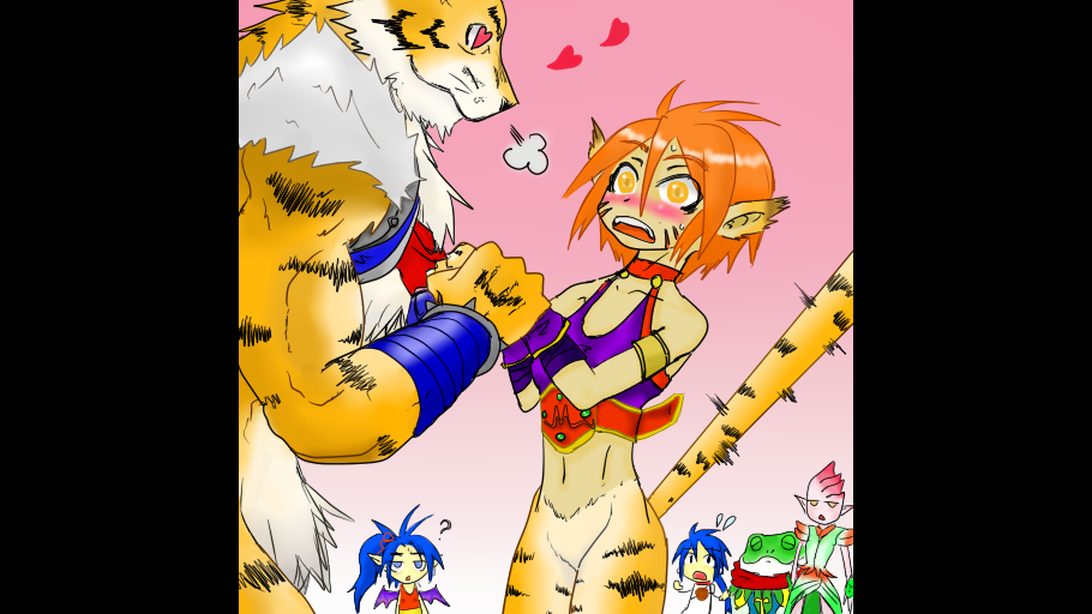
THUMBNAIL ART BY:「せいはち」(Check the uncropped version in his art gallery!)
せいはち's ART GALLERY: https://www.pixiv.net/en/users/3498832/illustrations
Special thanks for giving me permission to use it!WHERE'S SOLO?:
In Daisy's field.WHY DIAMOND/SKULL BRACES ARE USELESS:
The PC's Wisdom gives the following chances for Death to hit:PC WISDOM:
0-16 (40/64)
17-32 (38/64)
33-48 (36/64)
49-80 (32/64)
81-112 (24/64)
113-160 (16/64)
161-204 (8/64)
205-255 (Immune)And the enemy's wisdom gives the following bonuses
ENEMY WISDOM:
0-16 (None)
17-32 (10%)
33-48 (20%)
49-80 (30%)
81-112 (35%)
113-160 (40%)
161-204 (45%)
205-255 (Guaranteed if no Life Bracer)The SkullBR and DmndBR multiply these by 1.5x and 0.5x respectively, but do nothing to the base chance.
So, say Katt fights Necromancer. With 46 Wisdom (36/64), Necromancer's Wisdom (45%) multiplies that to 52/64. DmndBR halves the multiplier to 22.5%, reducing his hit rate all the way down to...44/64. SkullBR turns it into a 90% multiplier.
TL;DR—DmndBR is almost worthless & the SkullBR is shmuck bait.
ENEMY AI:
Assassin (50% Critical Hits):
1/64 defend
Otherwise, Attack (75%) or Cast Def-Down/Weaken (25%)Dark Crusaders:
If any monster is under 75% HP, Cure 4 on whichever monster is missing the most HP. If there is a tie, choose the last monster among those qualifying. If no AP, attack instead.
Otherwise, 1/64 defend
Otherwise, Attack or Cast a Spell
Spell List: Def-UpX/Shield (x1.2 to Party Defense) or Shield/Barrier (Double someone's Wisdom)Magic Knight (Usually outspeeds; Immune to all non-Item Magic):
1/64 defend
Otherwise, Attack (75%) or Cast Cure 1/Heal (25%)RAY AI (Cannot be dodged):
Phase 1 (before 256 DMG): Attack party leader (Ryu)
Phase 2 (after 256 DMG): Etherstorm (deals 100-163 damage to the entire party)[If Ryu survives Etherstorm, he learns G.Drgn/Kaiser Dragon. Using that will automatically end the fight. If Ryu dies before it can be used, you can refight Ray—he'll start in Phase 2, and Ryu will automatically learn it again.]
ARCHER AI:
3/4 Attack twice, 63/256 Attack once, 1/256 DefendOLD MAN AI:
If all three Guardeyes are alive, with probability 0 (turn 1-2), 1/8 (turn 3-4), 1/2 (turn 5-6), or 9/16 (turn 7+), use Delta Attack. Delta Attack has the same effect as Fireball (6/16 chance), Hail/Blizzard (5/16 chance), or Bolt X/Valhalla (5/16 chance).Otherwise, if any Guardeyes have 25% AP or lower, restore them to full AP.
Otherwise, do nothing[The battle ends automatically when all three Guardeyes are dead]
HEALING EYE (Right one; Usually outspeeds):
If Oldman is alive and using delta attack, do nothing
Otherwise Cure 3/Vitalize (98.4%) or Defend (1.6%)FIRE EYE (Bottom one; Weak to Ice; Usually outspeeds):
If Oldman is alive and using Delta Attack, do nothing
Otherwise Iceblast (98.4%) or Defend (1.6%)CHILLY EYE (Left one; Weak to Fire):
If Oldman is alive and using Delta Attack, do nothing
Otherwise Fireblast (98.4%) or Defend (1.6%)THE ROUTE:
---------------------------------------------------------
VS. Ray (~500 HP): Defensive
Turn 1: Ryu uses Whelp
Turn 2: Kaiser Dragon
---------------------------------------------------------
—EQUIP: Life Armor to Ryu
—UNEQUIP: Speed Shoes from Ryu
——Kill encounters with 20 AP Kaiser Dragons (40 AP on Dark Crusaders)
Snag Blast Fist after Daisy’s death---------------------------------------------------------
VS. Archers (310 HP): Normal
Ryu Attacks, Lin boosts Ryu, the rest Defend.
---------------------------------------------------------Roof: Follow Habalk down
1st Room: Take the nearest left door
2nd Room: Snag Rainbow Robe.
3rd Room: Grab Crimson Cloak, if you missed it.
Boss Room: Heal everyone to full
—EQUIP: x2 Courage Belts to Ryu & Sten, Blast Fist to Rand, and Rainbow Robe to Lin
—UNEQUIP: Holy Scarf from Rand---------------------------------------------------------
VS. x3 Guardeyes (538 HP apeice): Normal
Turn 1: Frost Whelp on bottom eye while everyone spams Fire Spices
Turn 2: Lin boosts Ryu, Sten Fireblasts or Heals Ryu, Ryu kills left eye, Rand Blast Fists right eye (left if Sten had to heal)
Turns Onward: Ryu melee + Blast Fist right eye to death
--------------------------------------------------------- -
You all ready for a two-parter?! That's right, it's our final attack on Evrai itself, the heart of the Eva faithful! Can we rescue Daisy? Will Tiga succeed in crushing the church? Find out, today!
Part 26: Breath of Fire II Walkthrough—Please God (Attack on Evrai, Part 1/2)
PLOT POINTS:
1. Break Nimufu's curse
2. Recruit Seso.
3. Get Tier 2 dragons.
4. Expanding Township.
5. Defeat Jailer.
6. Finish SimaFort cooking contest.
7. Defeat Kuwadora.
8. Defeat Trout
9. Defeat Munmar.
10. Defeat M.C.Tusk.
11. Complete Highfort.
12. Learn of the Queen of Tunlan's condition.
13. Defeat the monsters inside the Queen.
14. Defeat Aruhamel.
15. Receive permission to enter SkyTower.
16. Clear Daisy's field.
18. Talk to the guard outside Namanda.
19. Defeat Paladin.
20. Defeat Guardian.
21. Acquire the Great Bird.
22. Talk to Claris.
23. Acquire ThvsTomd's treasure.
24. Recruit Seny.
25. Defeat Necroman.
26. Incorrectly answer the guard's question in Evrai.
27. Defeating (spoiler).
28. Trigger the trap in Evrai
29. Recruit Solo the Earth Shaman
30. Defeat Guardeyes.FOOTMAN/MONK AI:
1/64 defend
With probability 100% (turn 1), 5/8 (turn 2), 1/4 (turn 3), or 0 (turn 4+), cast Atk.Up/Might
Otherwise AttackTHE ROUTE:
Overworld:
Fly to Evrai (just below Guntz and Wyndia)Evrai Church:
—BUY: As many Wisdom Seeds as possible
Talk to Tiga (located where Claris was)
Answer “Evanth” to the Temple Knight’s question, unless you wanna fight...---------------------------------------------------------
VS. Monk (1250 HP): Normal, then Scatter
Turn 1: Sten boosts Ryu, and Nina attempts to land Blunt
Turn 2: Sten boosts himself, Ryu Attacks, Rand Rouses Ryu pre-emptively, and Nina Blunts
Turn 3+: Keep attacking while Rand & Nina repeat their actions!
---------------------------------------------------------Do cutscenes
Make a Ryu/Sten/Lin/Rand party
—UNEQUIP: Life Armor & Courage Belt from Ryu
—EQUIP: Cloth + Speed Shoes to Ryu; Holy Scarf to Rand -
And now for a spot of characterization for Rand, and some not-so-subtle foreshadowing from Nina!
PARTY CHAT (Tiga & Lin!):
 Bosch: Tiga and Lin... Two peas in a pod, if ever I saw such a pair. They favor each other, and I'm not just talking about their species. I'm sure they'll make a splendid couple.
 Rand: I feel like a man who has just had all his debts taken up by a saint... But who am I kidding? It's like an empty nest all of a sudden.
 Lin: My people are few and far between. This is the first time I've ever actually met another Woren...
 Sten: Rand's face has been looking a bit longer than usual these days. I'd say he had a bit of a crush on Miss Lin himself...but then again, perhaps not. Ohohoho!
 Tapeta: Two handsome men fight to steal the heart of the fair Mademoiselle Lin... Ah, c'est la guerre!
 Aspara: [Same dialogue as last time]
 Deis (in the lobby): Don't worry! I'm sure Lin'll come back to us!
 Nina: ...My eyes must be playing tricks. For a second there, I thought you looked like Patty... Maybe you're related?... Nah!
-
Now is the time for the bonus episode! X1 had a "Beginner strats" video, and now this one will too! Also, we show off some other neat stuff, like how to bring the Ride Armor into the Crystal Snail mini-boss fight, the upgraded Raider Killer mini-boss in Centipede's stage, the intended way to get Morph Moth's heart, and other things!

X2 Parts 2-4 (Beginner Version): All Upgrades & Mavericks (with Achievements/Trophies)
NOTE:
You should watch this if you have trouble following the normal Walkthrough. Otherwise, you can skip it. Also, if you're worried about achievements, you should finish the Prologue for "Size Matters Not" first.QuotePASSWORD (NO ACHIEVEMENTS / ONE ZERO PART MISSING): 6666 6666 6666 6626
or
QuotePASSWORD (NO ACHIEVEMENTS / ALL ZERO PARTS): 6666 6566 6666 6626
Skips Opening, gets you x4 Heart Tanks, x2 Sub-Tanks, and the Boot + Armor upgrades. Also defeats everyone but Wire Sponge & Flame Stag
[Still needs to get Gator Buster, Sponge Sub-Tank, Stag Heart, Moth Heart, Centipede Sub-Tank, Snail Heart + Helmet, and Ostrich Heart]
QuotePASSWORD (ALL ACHIEVEMENTS): 6626 6566 6666 6426
Skips Opening, gets you x4 Heart Tanks, x2 Sub-Tanks, and the Boot + Armor upgrades. Also defeats everyone but Wire Sponge, Flame Stag, & Magna Centipede
[Still needs to get Gator Buster, Sponge Sub-Tank, Stag Heart, Moth Heart, Centipede Sub-Tank, Snail Heart + Helmet, and Ostrich Heart.
ROUTE TAKEN FOR THESE BEGINNER STRATS:
QuoteWheel Gator: Arm Buster
Wire Sponge: Sub-Tank (get "Half the Sponge He Used to Be" achievement)
Flame Stag: Heart Tank (get "Dodge This!" achievement)
Morph Moth: Heart Tank
Magna Centipede: Sub-Tank (get Covert Ops achievement)
Crystal Snail: Helmet Part & Heart Tank
Overdrive Ostrich: Heart Tank (get "Friendly Neighborhood Mega Man" achievement)
-
So how can we get into Evrai WITHOUT things going pear-shaped, like last time? Find out, today, as we attack Rhode Chapel!
Part 25: Breath of Fire II Walkthrough—Dying Corpse (Necromancer and the Secret Shaman)
PLOT POINTS (Gone forever, if done before recruiting Beretta. She upgrades her wares for every 8 you get, up to a max of 24):
1. Breaking Nimufu's curse
2. Recruiting Seso.
3. Acquiring the Tier 2 dragons from behind the waterfall.
4. Recruiting three tenants and expanding Township.
5. Defeating Jailer.
6. Finishing SimaForts cooking contest.
7. Defeating Kuwadora.
8. Defeating Trout
9. Defeating Munmar.
10. Defeating M.C.Tusk.
11. Acquiring the Famous Flute.
12. Hearing the Queen of Tunlan's condition.
13. Defeating the monsters inside the Queen.
14. Defeating Aruhamel.
15. Receiving permission to investigate SkyTower.
16. Clearing Daisy's field.
18. Talking to the guard outside Namanda.
19. Defeating Paladin.
20. Acquiring the Mark of the Wing.
21. Acquiring the Great Bird.
22. Talking to Claris.
23. Acquiring the ThvsTomd's treasure.
24. Recruiting Seny.
25. Defeating Necroman.WHAT TO BUY FROM BERETTA?:
KaiserKN for Rand, then as many HolySHs, ShinyHTs, & HeroARs as you wish (just remember that you get one of each of those armors in the final dungeon). Don't bother with the HolyRBs—you get plenty endgame armors for mages that have equivalent defense and better resistances.BANDO/RHODE'S HIDDEN TREASURES (must stand on right arrow for 5 minutes):
1st & 6th Rooms: Hidden fight (Warrior/Acolyte)
2nd Room: Star Shield (Lightning resistance)
3rd Room: Crimson Cape (Fire resistance)
4th Room: NPCs
5th Room: Seny/SaynieENEMY AI:
Demon Spirits (Immune to status ailments; Weak to Holy; Halved damage from most else):
1/64 defend
Otherwise, Attack or Cast a Spell
Spell list: Sap/Drain (Steal HP) or Drain/Leech Power (Steal AP)[Intended to just attack when its AP is 12.5% or lower. However, this check is bugged, so this will never happen.]
Maindstrs/Mind Blasters (Immune to status ailments; Weak to Holy; Halved damage from most else):
1/64 defend
With probability 100% (turn 1), 5/8 (turn 2), 1/4 (turn 3), or 0 (turn 4+), Cast a Spell
Otherwise Attack
Spell list: Hush/Silence (75%), Freeze/Iceblast (25%)Lyvermas/Living Armors (Immune to status ailments; Weak to Holy; Halved damage from most else):
1/64 defend
Otherwise, cast spell with probability 17/256 (if over 50% HP), 33/256 (if over 25% and at most 50%), 65/256 (if over 12.5% and at most 25%), or 129/256 (if 12.5% HP or under)
Otherwise Attack
Spell list: Curse or Sap/Drain (Steal HP)Death Spiders (Weak to Fire):
Run away with probability 3/8 (turn 1-4) or 100% (turn 5-7)
Otherwise, 1/64 defend, 63/64 attack[The probability of fleeing was intended as 1/16 (turn 1), 1/8 (turn 2), 1/4 (turn 3), or 3/8 (turn 4+). Death Spiders were also intended to have a 75% chance of using Poison Attack on turns where they don’t flee or defend. However, both of these are bugged]
FOOTMAN/SOLDIER AI:
If under 75% HP, Cure 2/Rejuvinate (or attack if 0 AP)
Otherwise, 1/64 defend
Otherwise, Attack (75%) or Cast Hush/Silence (25%)WARRIOR/ACOLYTE AI:
1/64 defend
Otherwise, Zombie Attack (75%) or Attack (25%)ZOMBIE/ENTOMBED AI (Weak to Fire & Holy):
1/64 defend
Otherwise, Attack or Cast a Spell
Spell list: Sap/Drain (Steal HP) or Drain/Leech Power (Steal AP)NECROMANCER AI (Weak to Fire & Holy):
If 50% HP or lower: Sap/Drain (62.5%)
Otherwise, 1/64 defend
Otherwise, Attack (25%) or Cast a Spell (75%)
Spell list: Zombie Attack (50%), Foul Breath (25%), Death (25%)---------------------------------
THE ROUTE:
Farma:
—CHANGE PARTY: Ryu/Sten/Rand/Nina-------------------------------------------------------------
VS. Soldier (956 HP): Normal
Sten uses Ares Shield on Ryu while the others Defend, then Auto
-------------------------------------------------------------Rhode Chapel:
Wait on the arrow till the room shakes four times, then go straight to the bosses.
—Death Spiders: Emperor's Edge + Fireblast
—Demon Spirits: Ryu Attacks with Might till dead
—Everything Else: Switch
—EQUIP: Life Armor + Ares Shield + Courage Belts on Sten. Leftover Armor & Courage Belts on Ryu.---------------------------------------------------------
VS. x3 Entombed (682 HP): Defensive, then Scatter
Turn 1: Ryu Defends, Sten gets Might on himself, Rand uses Fire Spice, Nina Rejuvinates Sten
Turn 2: Scatter; Ryu Defends, Sten OHKOs, Rand uses Rouse on Ryu, Nina Rejuvinates Ryu
Turn 3: Same as Turn 2, within reason
Turns Onward: Walk into the next fight with Ryu at full AP, Sten at full HP, and everyone alive.
------------------------------------------------------------------------------------------------------------------
VS. Necromancer (2400 HP): Scatter
Turn 1: Ryu Fire Whelps, Sten equips Ice Shield and attacks, Rand uses Ares Shield on Sten, Nina Rejuvenates Sten
Turns Onward: Be aggressive! You can kill him in 3 Turns if all goes well!
---------------------------------------------------------Cleanup (monsters disappear till you exit the dungeon!):
Go back to the arrow
Snag the Star Shield, Crimson Cape, & Saynie! -
On 4/28/2021 at 9:56 AM, AnonymousSpeed said:
Speaking of Silk Shot, was it planned to have Serges appear in Crystal Snail's stage? Is the location of the X-Hunters manipulable or something?
Sorry I forgot to answer this! Anyway...
Short Answer:
Yes, it was planned.
Long Answer:
The X-Hunters will move in a fixed order to a different location - they'll do so each time you enter and exit a stage.
I don't know what that order is *exactly*, since it probably depends on the first two guys you killed... I just know that if you do the exact same thing on every playthrough, THEY will visit places in the exact same order.
So, there ya go! Hope that helps!
-
Alright guys! Ready to throw down with the X-Hunters?! Because here we knock them down in one fell swoop, along with their remaining lackeys!
Part 4: Mega Man X2 (100% Guide)—X-Hunters, Round 1 (Stag, Centipede, Snail—All Trophies)
ABOUT THE SPEED BURNER:
This "elemental weapon" will do 5 DMG at base and 25 Damage to those weak to it. Both these values are cut to 1/5th inside water.The charged version allows a second, longer Air Dash that does 1 DMG every 2 frames.
ABOUT THE MAGNET MINE:
This "industrial weapon" does 1 DMG every 2 frames at base and 5 DMG to those weak to it. This applies to its normal AND charged versions, and both can be guided by the D-Pad.ABOUT THE CRYSTAL HUNTER:
This "utility weapon" is unique. The normal version freezes any enemy weak to it, and bounces off any that aren't. The charged version makes everything go at half speed for a short while.It shares the weakness table of Strike Chain, so it will freeze anything that Strike Chain is effective against.
ACHIEVEMENTS SO FAR:
1) "Size Matters Not"—Beat the opening stage without taking damage.
2) "Take Your Time"—Let Morph Moth transform without hitting him.
3) "Dodge This!"—Kill 1 of 8 starting Mavericks with Giga Crush.
4) "Friendly Neighborhood Mega Man"—Charged Junk Shot to get items in 1 of 3 secret areas (located in Bubble Crab, Overdrive Ostrich, & Crystal Snail)
5) "Covert Ops"—Dodge all the spotlights AND beat up Magna Centipede *on the same visit*!
—Yes: That means it's unobtainable once you destroy him.
6) "Second Armor"—Complete the armor!ENEMY LIST (Flame Stag):
Beetron: 48 HP (Weak to industrial weapons) [Drops ammo]
Barite Lasters (wall guys): 4 HP (Weak to industrial weapons) [Drops health]
Bar Wayings (gate guys): 27 HP (Weak to industrial weapons) [Does not drop health or ammo]
Morguns (flying squirrel guys): 1 HP [Drops ammo]ENEMY LIST (Magna Centipede):
Barrier Attackers: 2 HP (Weak to utility weapons) [Drops ammo]
Bleckers (small boxes): 18 HP (Weak to industrial weapons) [Drops health]
Installers (big boxes): 20 HP (Weak to industrial weapons) [Drops health, ammo, & extra lives]
Barite Lasters (wall guys): 4 HP (Weak to industrial weapons) [Drops health]
Scramblers (copter guys): 1 HP [Drops health]ENEMY LIST (Crystal Snail):
Batton Bone Gs (bats): 3 HP (Weak to utility weapons) [Drops ammo]
Refleczers (crystal shooters): 5 HP (Weak to industrial weapons) [Drops health & ammo]MINI-BOSSES:
Chop Register (Sword):
HP: 32 (Weak to Strike Chain & Junk Shot—Charged Sonic Slicer OHKOs, too)
Damage: 2 (contact)
Invincibility Frames: None (Giga Crush=Dead)Raider Killer (Humanoid):
HP: 32 (Weak to Speed Burner)
Damage: 2 (Palm Cannon), 3 (Scatter Shot), 4 (contact), 2 (Shield—only available to higher forms)
Invincibility Frames: Half a second's worth (Giga Crush=5 DMG)Magna Quartz (Crystal):
HP: 20 total (Weak to Junk Shot)
Damage: 2 (Lasers), 3 (contact)
Invincibility Frames: ~0.97 seconds worth (Giga Crush=2 DMG)------------------------------------------------------------------------------------------------------
BOSSES:
Agile stats:
HP: 32 (Weak to Rock-type Junk Shot & Magnet Mine)
Damage: 1 (Sword Beams), 3 (Saber Dash), 3 (contact)
Invincibility Frames: ~0.97 seconds' worth (Giga Crush=2 Damage)Agile A.I.:
1) He reacts to your moves. Stay in the air, and he'll always spam Sword BeamsFlame Stag:
HP: 32 (Weak to Bubble Splash)
Damage: 2 (contact), 2 (Flame Trail), 2 (Fireballs), 3 (Wall Uppercut), 2+5 (Suplex)
Invincibility Frames: ~0.97 seconds' worth (Giga Crush=2 Damage)Flame Stag A.I.:
1) Uses Suplex at 16 HP or less.
2) Will use Wall Uppercut if you're too high up when you're on the same wall he's going up.
3) Will not use Suplex or Wall Uppercut if you repeatedly grab, and let go of, the wall you're on in rapid succession.Violen stats:
HP: 32 (Weak to Grass-type Junk Shot)
Damage: 2 (Pellets), 3 (contact), 5 (Mace)
Invincibility Frames: ~0.97 seconds' worth (Giga Crush=2 Damage)Violen A.I.:
1) Leans head back=Forward swing. Looks to the side=Overhead swing.Magna Centipede stats:
HP: 32 (Weak to Junk Shot)
Damage: 3 (Shurikens), 3 (Tail Fragments), 4 (contact)
Invincibility Frames: ~0.97 seconds' worth (Giga Crush=2 Damage)Magna Centipede A.I.:
1) Will disable Charge → Rapid Fire → Dash → Jump height, in that order.Serges/Sagesse stats:
HP: 32 (Weak to Ice-type Junk Shot & Sonic Slicer)
Damage: 1 (Cloak Throw), 1 (Spikes), 1 (Spread Gun), 3 (contact), 4 (Mines)
Invincibility Frames: ~0.97 seconds' worth (Giga Crush=2 Damage)Serges/Sagesse A.I.:
1) The shield rises the minute you press the Shoot button (having it held will bypass it)
2) Can be stun-locked right after getting knocked down, as he climbs to his feet.Crystal Snail stats:
HP: 32 (Weak to Magnet Mine)
Damage: 4 (contact)
Invincibility Frames: ~0.97 seconds' worth (Giga Crush=2 Damage)Crystal Snail A.I.:
1) Will attempt to slow time at 9 HP or less -
Sorry this took so long! I'll try to pick up the speed in the future! Anyway... Here's us fishing some of the game's best equipment, and here's Tiga trying to fish himself a soul mate!
Part 24: Breath of Fire II Walkthrough—Fishing Man (Tiga & Fishing Treasure Chests/Spots)
THUMBNAIL ART BY: 「せいはち」
せいはち's ART GALLERY: https://www.pixiv.net/en/users/3498832/illustrations
Special thanks for giving me permission to use it!WARNING:
The Manillo merchant near Kotto will NOT spawn if you fight on the island directly next to him. You must fight on the landmass to the *right* of where he spawns, instead! Do like I do in the video!IF YOU CAN'T AFFORD THE MEDUSA/ARES SHIELD:
You can cook Gold Bricks/Biscuits, or simply recruit Deis for her Might spell. We're at the point in the game where she's not that broken anymore.PLOT POINTS (Gone forever, if done before recruiting Beretta. She upgrades her wares for every 8 you get, up to a max of 24):
1. Breaking Nimufu's curse on Jean.
2. Recruiting Seso.
3. Acquire the dragon powers from the old man behind the waterfall.
4. Recruiting three residents and expanding Township.
5. Defeating Jailer.
6. Finishing the cooking contest in SimaFort.
7. Defeating Kuwadora.
8. Finding out about the Gate incident at the Rangers' Guild.
9. Defeating Munmar.
10. Defeat M.C.Tusk.
11. Acquiring the Famous Flute.
12. Finding out about the Queen of Tunlan's condition.
13. Defeating the monsters inside the Queen's body.
14. Defeating Aruhamel.
15. Receiving permission to investigate the Sky Tower.
16. Recruiting Spoo.
17. Plowing Daisy's field and resting overnight.
18. Talking to the guard outside Namanda.
19. Defeating Paladin.
20. Acquiring the Mark of the Wing.
21. Acquiring the Great Bird.
22. Trying to leave Evrai after talking to Claris.
23. Acquiring the "Evidence" (actually called "Thief's Emblem") from ThvsTomd.OTHER FISHING SPOTS (Scroll down to "fishing spots", and see what's next to the Treasure Chest icons):
https://vgmaps.com/Atlas/SuperNES/BreathOfFireII-World.pngENEMY AI:
Mammoths (Weak to Fire):
75% chance to attack twice
1/64 defend
Otherwise, Attack (75%) or Cast 8.0/Quake (25%)Kimairas/Chimeras (Weak to Ice; 37.5% Counter-attacks):
1/64 defend
Otherwise, Attack or Use Fire BreathG.Idols/Vulcan Rocks (Weak to Ice; Always goes last; Immune to Death & all status ailments):
Always Attack if BuildUp was used last turn
Otherwise, 75% chance to use BuildUp
Otherwise, 1/64 defend
Otherwise, Attack (83%) or Cast Fireball (17%)Cyclops (50% Criticals; Effectively no resistance to Death or status ailments):
1/64 defend
Otherwise, Attack (75%) or Cast a Spell (25%)
Spell list: Atk-Up/Might or Def-Up/ProtectMarble Golems (Always goes last; Immune to Death and all status ailments):
50% to Defend
Otherwise, Attack or Cast Spark/Flare---------------------------------
THE ROUTE:
Overworld:
Fly up to TownshipTownship:
Heal up, save, then cook x2 Gold Bricks with Guts Pills & Turbocharge!Overworld:
Fish out Emperor's Edge near Township
—Slay Ryu & Nina as you do so, in order to get the Flee bonus!
Fly up to Newhaven, up-left to Mt. Maori, then left to Gate
—Enter Gate for Warp point, if you haven't already
Go to the fishing spot, then spawn the fish
—Switch till you get a G.Idol/Vulcan Rock or Marble Golem, then Flee. It's guaranteed if Ryu & Nina are dead, and Sten is in fusion form!
Fish out some Life Armor for Ryu
Go lower-left near Kotto, go further lower-left till island, then fish out Manillo
—Equip best gear to Sten, and fight some battles. He and Lin alone should be able to handle the randos here.
Remove the Angler's Rod when all's said and done, then equip everyone like so before selling:---------------------------------------------------------
Ryu: Emperor's Edge, Life Armor, Bolt Gloves, Sun Mask, x1 Courage Belt
Sten: Crimson Dirk, Earth Armor, Ice Shield, Circlet, Speed Shoes + Courage Belt
Katt/Lin: Wind Robe, Alloy Band, Silver Tiara
Nina: Holy Scarf
---------------------------------------------------------—SELL: All except x2 Courage Belts, Restoratives, Vitalizers, Moon Drops, Holy Tears, Wisdom Seeds & Fruits, Fire Spices, Hardtacks, Speed Suit, & weak armor
—BUY: Ares Shield
Do cutscenes then fly up to FarmaNOTE:
You can also sell the Earth Armor if you really need to. The Speed Suit is sufficient enough Defense for Sten. -
Awesome. New episode should come shortly, btw. Sorry for the delay!
-
8 hours ago, AnonymousSpeed said:
I was completely unaware of this- fascinating though, very good to know. It seems like X2 uses much higher damages for numbers to accommodate for this system.
Indeed.
8 hours ago, AnonymousSpeed said:With respect to the changed dialogue for the X-Hunters, I guess they figured that Violen was the big monkey guy, so he should be more foolish and brash than Agile, who looks more poised.
Perhaps. This is in response to Part 2, right?
8 hours ago, AnonymousSpeed said:This was another thing I didn't know about- again, fascinating. If this can be pause buffered, I should be able to learn it.
Absolutely! The 2nd Neon doesn't even require it. It's just a matter of "Press Shoot & Jump at the exact same time while Air Dashing".
-
You all ready for double jumps? For how to get Morph Moth's Heart Tanks without the Crystal Hunter? For more special weapon pwnage, A.I. exploitation, and mini-boss quick kills... and also the most obnoxious achievement in the game? Then welcome back to X2!
Part 3: Mega Man X2 (100% Guide)—Morph Moth & Bubble Crab (All Trophies/Achievements)
THUMBNAIL ART FROM:
The Teppen series of trading cards.THE TROUBLE WITH CRYSTAL SNAIL FIRST:
Snail is weak to Centipede's weapon, and Centipede is exceptionally hard to 100% without the Speed Burner, which comes from Flame Stag. You would like Bubble Splash before Flame Stag, but you'd really like the Sonic Slicer for slaying mini-bosses in Crab, Centipede, & Moth's stage. The order, then, works out something like:QuoteOstrich → Crab → Stag → Centipede → Snail → Moth
...Except that means you have to revisit a stage in order to *get* Friendly Neighborhood Mega Man (unless you Buster Duel Stag, and save Crab for last). Also, that's a long time without the armor. So just getting Moth's Heart Tank via Neon Jump saves a lot of hassle. You even get Junk Shot for Centipede, as a bonus!
HOW TO NEON JUMP (a double jump, basically):
1) Do an Air Dash
2a) Release Shoot & Press Jump in the middle of the Air Dash (1st Neon)
2b) Press Shoot & Jump at the same time in the middle of the Air Dash (2nd Neon)
3) Air Dash again, if needed (the game let's you use it again if you did this right!)ABOUT THE SONIC SLICER:
This "elemental weapon" will spit out two blades at a time. Each do 4 Damage at base, and 25 Damage to those weak to them. They also bounce off walls and other objects.The charged version spits out five waves of energy that go a bit up, spread out, line up single file, then come down. Each wave does 1 Damage a frame at base, and 5 Damage a frame to those weak to them.
ABOUT THE GIGA CRUSH:
It instantly kills regular enemies and does 1 Damage per 2 frames to bosses & some mini-bosses. Will refill when hit by projectiles (the exact amount depends on the attack), but never by contact damage.ABOUT THE JUNK SHOT:
This "industrial weapon" works like the Shotgun Ice did from X1. It spits out a big chunk that then breaks into four little chunks that go upper-left, lower-left, upper-right, and lower-right. Each chunk does 3 Damage at base (up to a maximum of 15), and 15 Damage to those weak to them (up to a maximum of 75).The charged version upgrades this to eight little chunks. Each chunk does 6 Damage at base (up to a maximum of 48), and 30 Damage to those weak to them (up to a maximum of 480).
The chunks themselves also change depending on the stage. Wire Sponge turns them into leaves (which do only 1 Damage at base & 2 Damage when charged), Flame Stag & Bubble Crab turn them into rocks, Crystal Snail turns them into crystals, and all other stages turn them into scrap metal.
ACHIEVEMENTS SO FAR:
1) "Size Matters Not"—Beat the opening stage without taking damage.
2) "Take Your Time"—Let Morph Moth transform without hitting him.
3) "Dodge This!"—Kill 1 of 8 starting Mavericks with Giga Crush.
4) "Friendly Neighborhood Mega Man"—Charged Junk Shot to get items in 1 of 3 secret areas (located in Bubble Crab, Overdrive Ostrich, & Crystal Snail)ENEMY LIST (Morph Moth):
Hanged Reploids: 1 HP if hung, 8 when standing (Weak to elemental weapons) [Drops health]
Disk Boy 08 (shield guys): 16 HP (Weak to utility weapons) [Drops ammo]
Garakuta Robots (miner guys on wheels): 22 total HP (Weak to industrial weapons) [Drops ammo]
Pararoid V-1s (they control you): 5 HP (Weak to utility weapons) [Drops health]
Pararoid R-5s (they fly): 5 HP (Weak to utility weapons) [Drops ammo]
Cannon Driver: 40 HP (Weak to industrial weapons) [Drops health]ENEMY LIST (Bubble Crab):
Batton Bone Gs (bats): 3 HP (Weak to utility weapons) [Drops ammo]
Fisherns (fish): 1 HP (Weak to industrial weapons) [Drops ammo]
Jelly Seekers: 4 HP (Weak to industrial weapons) [Drops health]
Barite Lasters (wall guys): 4 HP (Weak to industrial weapons) [Drops health]
Scrivers (screwdrivers): 4 HP (Weak to utililty weapons) [Drops health]MINI-BOSSES:
Old Robot:
HP: 30 (Weak to industrial weapons)
Damage: 2 (Scrap Shot), 2 (contact)
Invincibility Frames: None (Giga Crush=Dead)Pararoid S-38 (inside the Old Robot):
HP: 36 (Weak to elemental weapons)
Damage: 2 (contact)
Invincibility Frames: None (Giga Crush=Dead)Sea Canthller (Giant Fish):
HP: 283 total (Weak to elemental weapons; 120 for the tail, 72 for the back fin, 40 for the red orb, 30 for the front fin, 15 for the lower jaw, 9 for the face).
Damage: 1 (Laser), 3 (contact), 4 (Mines)
Invincibility Frames: None (Giga Crush=Dead)BOSSES:
Morph Cocoon stats:
HP: 32 (Weak to Speed Burner)
Damage: 2 (Debris), 4 (contact)
Invincibility Frames: ~0.97 seconds' worth (Giga Crush=2 Damage)Morph Cocoon A.I.:
1) Will transform to Morph Moth when its sucked up enough debris, or when dropped to 12 HPMorph Moth stats:
HP: 12-32 (Weak to Speed Burner)
Damage: 2 (Dust), 2 (Laser), 8 (contact)
Invincibility Frames: ~0.97 seconds' worth (Giga Crush=2 Damage)Bubble Crab stats:
HP: 32 (Weak to Spin Wheel)
Damage: 2 (Bubbles), 3 (Shoulder Spikes), 3 (contact)
Invincibility Frames: ~0.97 seconds' worth (Giga Crush=2 Damage)Bubble Crab A.I.:
1) Always uses Shoulder Spikes when you're right above him. -
On 4/6/2021 at 2:27 PM, bobflac said:
That scene has always been a chilling one for me. I imagine the scene going down as Nina hurling her frail body against the iron door, bruising her extremely lightweight skeleton in the process, trying to force it open to save the only person outside the party who matters to her and being absolutely devastated as to what occurred. Everyone I know always brings up Evrai as the most depressing sequence, but to me, this scene with Mina will always beat out that entire dungeon, even with sad ending.
I wish this was properly translated in the 90s like it should have been. It could have easily been in conversations regarding greatest RPGs with the Squaresoft stuff.
Indeed. The game's got some incredible highs, in addition to its lows. Its part of what makes it so great to LP. Now then...
-----------------------------------------------------------------------------------------------------------------------------------------------------------------------------------------------------
Wow! A grand-spankin' resistance group and everything! So this is who Gandalf the Elder Tree was talking about! But can we brave the bowls of the Thief's Tomb, and get them what they need? Find out, today!
Part 23: Breath of Fire II Walkthrough—Sandy Slumber (Thief's Tomb)
THUMBNAIL ART BY: 「せいはち」
せいはち's ART GALLERY: https://www.pixiv.net/en/users/3498832/illustrations
Special thanks for giving me permission to use it!PLOT POINTS (Gone forever, if done before recruiting Beretta. She upgrades her wares for every 8 you get, up to a max of 24):
1. Breaking Nimufu's curse on Jean.
2. Recruiting Seso.
3. Acquire the dragon powers from the old man behind the waterfall.
4. Recruiting three residents and expanding Township.
5. Defeating Jailer.
6. Finishing the cooking contest in SimaFort.
7. Defeating Kuwadora.
8. Finding out about the Gate incident at the Rangers' Guild.
9. Defeating Munmar.
10. Defeat M.C.Tusk.
11. Acquiring the Famous Flute.
12. Finding out about the Queen of Tunlan's condition.
13. Defeating the monsters inside the Queen's body.
14. Defeating Aruhamel.
15. Receiving permission to investigate the Sky Tower.
16. Recruiting Spoo.
17. Plowing Daisy's field and resting overnight.
18. Talking to the guard outside Namanda.
19. Defeating Paladin.
20. Acquiring the Mark of the Wing.
21. Acquiring the Great Bird.
22. Trying to leave Evrai after talking to Claris.
23. Acquiring the "Evidence" (actually called "Thief's Emblem") from ThvsTomd.ENEMY AI:
Cancers (Weak to Ice; No resistance to Death or status ailments):
1/64 defend
Otherwise, Attack (75%) or Cast Freeze/Iceblast (25%)Dinabehms/Dinabehemoths:
1/64 defend
Otherwise, Attack or Cast S.Boom/LightningTitongs/Titans (50% Critical Hits; No resistance to Death or status ailments):
1/64 defend
Otherwise, Attack or Cast a Spell
Spell list: Atk-Up/Might or Def-Up/ProtectKimairas/Chimeras (37.5% Counter-Attacks; Weak to Ice):
1/64 defend
Otherwise, Attack or Fire BreathAnubis Mummies (Weak to Fire; Outspeeds all but Super Sten):
1/64 defend
Otherwise, Attack or Cast a Spell
Spell list: Zombie Breath or Freeze/Iceblast[Like many spellcaster enemies, Anubus is intended to just attack when its AP is 12.5% or lower. However, this check is bugged, so this will never happen. It will just keep trying to cast spells.]
Death Spiders (Weak to Fire):
Run away with probability 3/8 (turn 1-4) or 100% (turn 5-7)
Otherwise, 1/64 defend, 63/64 attack[The probability of running away is intended to be 1/16 (turn 1), 1/8 (turn 2), 1/4 (turn 3), or 3/8 (turn 4+). However, the turn number was capped in the wrong direction before looking this value up. Additionally, Death Spiders is intended to have a 75% chance of using Poison Attack on turns where they don’t run away or defend. However, the upper byte of the Y register is cleared before this probability and spell list can be read, so the probability is read as zero.]
Sheefs/Zombie Thieves (50% Critical Hits; Weak to Fire):
1/64 defend
Otherwise, Attack (75%) or Zombie Attack (25%)Kiyhoods/Grubwyrms (Weak to Lighting):
1/64 defend
Otherwise, Attack (75%) or Cast a Spell (25%)
Spell list: Dream Breath (50%), Poison Breath (25%), Zombie Breath (25%)[Like many spellcaster enemies, Kiyhood is intended to just attack when its AP is 12.5% or lower. However, this check is bugged, so this will never happen. Also, none of its spells cost AP anyway.]
---------------------------------------------------------
THE ROUTE:
Evrai:
Get Wisdom Fruit in the right side of the big building
Talk to Claris
Try to leave
Talk to Claris again to go down toiletLabyrinth: (Defensive)
—Royal Guards & Lord Slug: Same strat as last time
—X1 Enemy: Auto, unless it’s Chimera or Marble Golem
—Marble Golem: Run
—Chimera: Switch
—x2 Enemies (and 1-2 of them are Cancers): Kill the Cancer(s) with Lin & Sten
—Anything Else: Switch
Get Angler Rod upstairs after resting at the inn
Fly up till you get to Guntz, then fly left to KottoKotto:
Talk to Tiga in the left houseOverworld:
Fly left to the desert continent.
Get the Turbocharge from the dresser in Deis’ Home
Go further left to the Thief’s TombThief’s Tomb (Defensive):
2nd Floor: Get Double Whip & Crimson Dirk, then fall down
—EQUIP: Crimson Dirk (Sten)
Puzzle Floor: Take left stairs
2nd Floor: Get Sun Mask & Bolt Gloves, then fall down
Puzzle Floor: Take fights on the yellow happy face until it teleports you to the end.
—X2 Grubwyrms: Switch
—X2 Anubis Mummies: Switch (while making sure Sten has Speed Suit equipped)
—Everything Else: Fireblast + Fire Spice (or Auto, if it’s just one)
Get the Thief’s Emblem, then Exit -
And now we get to some of the really interesting stuff! The Weapon Weakness system, the X-Hunter mechanics, the Japanese-exclusive story elements, and much more!
Part 2: Mega Man X2 (100% Guide)—Wheel Gator & Overdrive Ostrich (All Trophies/Achievements)
THUMBNAIL ART FROM:
The Teppen series of trading cards.WEAKNESS WEAPONS IN MORE DETAIL:
Most special weapons either do about as much as a LVL 2 Shot, or do a small amount of damage over time. However, they will do as much as 50 Damage in one shot, or 10 Damage a frame, to any enemy weak to them. Furthermore, regular enemies will have multiple weakness weapons, which can be divided into three camps:1) The "elemental weapons" (Bubble Splash, Speed Burner, & Sonic Slicer)
2) The "industrial weapons" (Silk Shot, Spin Wheel, & Magnet Bomb)
3) The "utility weapons" (Strike Chain & Crystal Hunter)Crystal Hunter will only freeze the enemies weak to it—it will only bounce off the rest. This also means that Strike Chain will OHKO any enemy that can be frozen.
ABOUT THE STRIKE CHAIN:
This "utility weapon" does 5 Damage at base, and 20 Damage to those weak to it. It also attaches to walls, and pulls X toward them a bit faster than Dash speed.The charged version, at base, does 2 Damage for every frame that the hook is inside the enemy. This increases to 5 Damage per frame to those weak to it. It pulls X to walls faster than a Ride Chaser moves. It also forces every enemy it destroys (even bosses) to drop health or ammo, in *addition* to what they may, or may not, have already dropped.
ABOUT THE SPIN WHEEL:
This "industrial weapon" does 5 Damage every 10 frames at base, and 25 Damage every 10 frames to those weak to it. It also destroys blocks and rubble, allowing you to access hidden rooms.The charged version does 10 Damage a bolt at base, and 50 Damage a bolt to those weak to it.
WHEEL GATOR'S STUN-LOCK IN MORE DETAIL (not enough time to cover in the video itself):
There's a brief moment at the beginning where you can strike Gator before he sinks. After that are 3 frames (frame=1/60th of a second) between when Gator is invincible via invincibility frames, and when he's invincible via diving in the water.The first window you get by having a Charged Strike Chain ready to go, then Dashing at the right moment after his health fills up. I accomplish that by pressing Dash three times (just for the rhythm), and then making the 4th Dash the real thing.
The second window I get by walking up to where X's head is about where Gator's shoulder is, keeping the Strike Chain *held*, and then releasing it the instant Gator's head is fully turned. That burns ammo almost twice as quickly as what top-level speedrunners do (they just press Shoot), but I find it takes out any inconsistency in my timing.
ACHIEVEMENTS SO FAR:
1) "Size Matters Not"—Beat the opening stage without taking damage.ENEMY LIST (Wheel Gator):
Tubamail-S: 4 HP (Weak to elemental weapons) [Drops health]
Tubamail Generator: 24 HP (Weak to elemental weapons) [Drops health]
Tiranos: 10 HP (Weak to utility weapons) [Drops ammo]
Disk Boy 08: 16 HP (Weak to utility weapons) [Drops ammo]
Rideroid G: 48 HP (Weak to industrial weapons) [Drops health]
Cannon Driver: 40 HP (Weak to industrial weapons) [Drops health]ENEMY LIST (Overdrive Ostrich):
Crash Roaders (pigs): 7 HP (Weak to utility weapons) [Drops ammo]
Aclandas (scorpions): 48 HP (Weak to industrial weapons) [Drops health]
Ride Chasers (motorcyclists): 8 HP (Weak to elemental weapons) [Drops ammo]BOSSES:
Wheel Gator stats:
HP: 32
Damage: 1 per hit (Bite), 2 (Spiked Walls), 2 (Mouth Blast), 2 (Spin Wheel), 3 (Charge), 3 (contact)
Invincibility Frames: ~0.97 seconds' worthWheel Gator A.I.:
1) Always sinks into the oil at the start, as well as every time he's struck with Strike Chain
2) Charges when he has less than 16 HP, every time he re-emergesOverdrive Ostrich stats:
HP: 32
Damage: 2 (Sonic Slicer), 2 (Rain Slash), 4 (Crane Kick), 4 (Ground Pound), 4 (contact)
Invincibility Frames: ~0.97 seconds' worthOverdrive Ostrich A.I.:
1) Uses Ground Pound when scrolled off-screen.
2) Rain Slash adjusts to your location before launched. You should stop till the Rain Slashes leave the screen, THEN go that little bit left or right to dodge them! -
-
15 hours ago, Dayni said:
Is this the only line she'll speak in the game?
If that' the case, making it so that it occurs while she transforms, even cutting off part way through could be devastating and make things even worse (And thanks for the laugh down the link, is that in all versions or was it censored for Nick?).
Nope! That's in all versions! It was intended to be only for Nicktoons, but it accidentally leaked into the Uncut audio as well. So, far as the English dub is concerned, the guy lives 😛 !
QuoteI hadn't seen this section of the game before (Nina coming back to Mina's sacrifice).
Is it fair to say that this might be the peak of the game? I mean in terms of emotional punches. The character seeking their end throughout the story seeing a chance to offer their life for their friends....
Only to have her sister do it so she wouldn't have to suffer. That on top of her already messy life before then, there's no way it'd just do away either. I'm curious to see whether it comes up again after this one.
Hmm... That's hard to say. The endgame is full of emotional gut punches, believe it or not. Apart from Highfort and the start, Breath of Fire II saves pretty much all its best stuff for last.
QuoteAnd a thing I had considered about the reason their transformation abilities were diluted: Maybe Nina the First's marrying Ryu 1 resulted in the people in Wyndia finding relationships among other peoples in their world, finding her example as something worth following?
Well... Randalor & Libluini on Something Awful bring up a good point. No race on Earth is entirely pure... Everyone's got a bit of all races in them (a large part of why racism is so stupid). That, and dragon clan blood tends to overpower other bloodlines, so once Nina got the ball rolling... Well, Breath of Fire was multiple centuries ago...
So even the most racist Wyndian rednecks would've eventually got some of Ryu in them. So...consider me corrected xD!
-
PARTY CHAT (After Mina's Scene):
Bosch: Mina...
QuoteI guess it's a good thing he never scored with her, eh?
Rand: I never imagined Mina could do something so brave and selfless... I guess it must run in the family.
Lin: I wish I could think of something to say to Nina...
Sten: I don't even have any witty remarks or clever puns for this situation... We cannot permit any more innocents to be involved in our struggle...
Tapeta: We must travel to Evrai, posthaste! This battle...it is no longer ours alone to fight!
Aspara: Mina laid down her life out of love for her sister... Let's repay that debt by getting to Evrai and putting those book-thumping bastards out of commission!
QuoteHis language *probably* isn't a translation error. Vulgar language is pretty easy to spot, even for a newbie like me.
Deis (in the lobby): I see the look in your eyes has changed, Nina. Calling you a 'sprout' now would be an insult...you've grown into a fine woman.
QuoteYou'll recall that was something of a thing in Deis' first Party Chat. The game lampshaded how badly Deis obsoleted her, with Deis calling her a "sprout", and Nina feeling insecure about it.
Nina: This is no time for mourning. Besides...Mina would be upset if she saw me crying...
QuoteMina WOULD be upset... Because apparently, she's still sapient, and can speak English and everything...
...All the writers needed to do...ALL they needed to do, was have her be silent! Keep the bird noises, keep the wing flaps, and just have no dialogue. Nina says her line about not mourning her, and the scene proceeds.
Instead we get the Breath of Fire equivalent of "DUDE, MAH TRUCK!!". Like the sort of thing a localizer would throw in to censor someone's death... Except it's actually in the original script...
-
Scalding Coffee from "Something Awful" makes an interesting point:
Quote
Breath of Fire III retcons it by implying it to be the result ofgenetic meddling by Myria, though her son may also be doing the same in this game.Anyway, Party Chat time!
--------------------------------------------------------------------------------------
PARTY CHAT (Before Mina's Scene):
Bosch: If Nina uses the power of the Great Bird, won't she be able to change back? ...I don't want her to be stuck as a bird! Ryu! Talk some sense into her!
Rand: Nina's made up her mind. Even if Ma hadn't been taken by those Church of Eva bastard, we'd still have to get to the Cathedral somehow... Dammit! Doesn't she care how the rest of us feel?
Lin: I'm sure Nina will become a beautiful bird...*sniff* *sniff*... Aw, hell! Why does she have to do this? I don't wanna lose our Nina!
Sten: This shouldn't be happening.
Tapeta: Nina had done nothing yet, and already I am...how you say...traumatized! Are these terrible circumstances not cause for much weeping?
Deis (in the lobby): Looks like the little sprout's a real princess after all. Nina's sure got guts...
Nina (in the lobby): I don't need your tears. Any one of you could make the same sacrifice... I'm certain of it.
Nina (in her room): The thought of giving up this life to become a Great Bird doesn't faze me at all... But I have one favor I'd like to ask. Just say to me..."I want you to become the Great Bird". Please?...
Nina (if you said Yes): ...So I shall.
Nina (if you said No): I...understand. I'm sorry I asked you to say such a thing...
QuoteThis is...actually a really interesting character moment, here. I say that because...
Aspara: I agree with Nina's reasoning. This is the most effective way for us to accomplish our goals...but why does it frighten me that she would sacrifice her life with so little hesitation?
Quote...Nina's a death-seeker. Her line is NOT bravado—she is genuinely unfazed by the thought of dying. She won't out-and-out commit suicide, but... The prophecy's in her head. Her family's in hot water for as long as she lives. She has to live far away, just so no trouble befalls them. In her mind? Their lives would be so much easier, if only she could just...vanish.
Recall her willingness to be Joker's slave. Recall her joking about Ryu "putting her out of her misery" if she got fat. See how determined she is to become the Great Bird. The reason for her request to Ryu is to convince herself that it's what he wants... That he wouldn't be THAT badly torn up about her leaving.
And if that's not proof enough?
The final boss even confirms it. "Her wish will come true. Her life is over." or "She came to this place...and her fondest hopes were granted...thus was she erased."
It's subtle enough for kids to miss, but... It's there. It's why Aspara's shaken up on a subconscious level.
-
10 hours ago, Dayni said:
Good thing too, that'd just make me think they're trying to get to Sesame Street.
It's interesting just how much of a difference there is between how some of the characters talk inside their rooms and around others too, a nice touch from BoF2.
Indeed. Also goes to show the amount of trust they have in Ryu as a leader and friend.
------------------------------------------------------------------------------------------------------------------------------------------
Now then! This is the moment! This is so big, Capcom based their commercial around this! Put a copyright claim on the video and everything!
Part 22: Breath of Fire II Walkthrough—White Wings (Guardian)
PLOT POINTS (Gone forever, if done before recruiting Beretta. She upgrades her wares for every 8 you get, up to a max of 24):
1. Breaking Nimufu's curse on Jean.
2. Recruiting Seso.
3. Acquire the dragon powers from the old man behind the waterfall.
4. Recruiting three residents and expanding Township.
5. Defeating Jailer.
6. Finishing the cooking contest in SimaFort.
7. Defeating Kuwadora.
8. Finding out about the Gate incident at the Rangers' Guild.
9. Defeating Munmar.
10. Defeat M.C.Tusk.
11. Acquiring the Famous Flute.
12. Finding out about the Queen of Tunlan's condition.
13. Defeating the monsters inside the Queen's body.
14. Defeating Aruhamel.
15. Receiving permission to investigate the Sky Tower.
16. Recruiting Spoo
17. Plowing Daisy's entire field
18. Talking to the guard outside Namanda.
19. Defeating Paladin.
20. Acquiring the Mark of the Wing.
21. Acquiring the Great Bird.ENEMY AI:
Gargoyles (Weak to wind):
If any monster is under 75% HP, Cure 2 on whichever monster is missing the most HP. If there is a tie, choose the last monster slot among those qualifying. If no AP, attack instead.
Otherwise, 1/64 defend
Otherwise, Attack (87%) or Fire Breath (13%)Baracudas/Valkyries (Weak to wind; Will always outspeed without grinding):
75% chance to attack twice.
Otherwise, 1/64 defend
Otherwise, Attack (87%) or Cast Typhoon (13%)Royal Guards (Immune to status ailments; Will always outspeed without grinding):
Run away with probability 3/8 (turn 1-4) or 100% (turn 5-7)
Otherwise, 1/64 defend, 63/64 attack[The probability of running away is intended to be 1/16 (turn 1), 1/8 (turn 2), 1/4 (turn 3), or 3/8 (turn 4+). However, the turn number was capped in the wrong direction before looking this value up. Additionally, Royal Guards are intended to have a 25% chance of casting Def-Up or Atk-Up on turns where they don't run away or defend. However, the upper byte of the Y register is cleared before this probability and spell list can be read, so the probability is read as zero.]
Royal Slugs (Weak to Fire; 50% chance to crit):
1/64 defend
Otherwise, Attack (75%) or Cast Spark/Flare (25%)GUARDIAN A.I.:
1/64 defend
Otherwise Cast a Spell with probability 89/256 (turn 1), 170/256 (turn 2), 100/256 (turn 3), or 170/256 (turn 4+)
Otherwise Attack
Spell list: Hush, Def-Down, Ag-Down, Pwr.Down[Guardian’s max HP/AP are the same as Nina’s. Guardian was intended to cast Cure4 when under 5/16 of her max HP. However, this check is bugged and instead tests whether Guardian’s max HP is at least 16618.
Guardian was also intended to have the same spellcasting probability as Paladin (excluding Cure 4 mentioned above). However, the high byte of the A register is not cleared [Nitrodon tried to explain why, but I didn't understand], so the probability is looked up in some unrelated table instead.
-
PARTY CHAT (Rand's mother bosses us around!):
Bosch: I wish my own mother were like that...
QuoteThe old translation put it as "I wish I had a mother like that"... It might actually be the more accurate translation, considering Bosch's status as an orphan.
Rand (in the lobby): Damn, this sucks!
Rand (in his room): Damn that crazy old hag! I wish the angels would hurry up and cart her off...but then again, they probably wouldn't wanna put up with her! ...Oh crap, did I say all that out loud?
QuoteI uh... Hope he didn't remember saying that after she got kidnapped...
Lin (in the lobby): How could a big guy like Rand be so scared of a little old lady like his mother? Who would ever peg him for such a big sissy?
Lin (in her room): Your mother died when you were just a child, right, Ryu? I wonder what she was like... She wasn't like Daisy, was she?
Nina: Rand may chafe at being called 'idiot boy' by his own mother...but from her, it's almost a term of endearment. In some ways, I'm a bit jealous...
QuoteI guess being exiled by your parents makes just about *anything* else look good 😛
Sten: Even if Master Rand became ten times as strong as he is now, he could never hope to compete against his own mother! Ohohohohoho!
Tapeta: Such a remarkable woman Madame Daisy is! Who would imagine such an aged person could be so strong? She reminds me so much of Petape... They would no doubt make great rivals!
Aspara: Grassmen don't have 'mothers' in the same way as other species. I was raised by the Elder Tree, so the closest thing I have to a mother would be Gandharve...
Deis (in the lobby): Rand is just so adorable at times like this...
------------------------------------------------------------------------------------------------------
PARTY CHAT (Daisy's kidnapped! How do we get wings?):
Bosch: If we could just get to the Cathedral, I'm sure we'd have all our questions answered...
Lin: Nina looks a little distressed all of a sudden...like she's got something she wants to say, but can't. Maybe you should talk to her, Ryu?
Sten: What a surprise. Master Rand seems genuinely mortified that his mother has been abducted...
Tapeta: Monsieur Rand seems to be quite, how you say, flustered... You cannot tell? It is as plain as the nose on his face! No one can hide their true emotions from moi!
Aspara: It does not seem logical that the absence of one person could cause such an emotional disturbance... However, when I myself ponder Daisy's fate, I cannot help but feel...sorrow? I never imagined I could experience such emotions...
Deis (in the lobby): I have a plan! Let's make a whirlwind tour of all the Eva churches in the world and bust 'em up, one after another! ...What? Don't you think it's a good idea?
Rand (in the lobby): So what now? The only way we can get to the Cathedral is if we sprout wings or something! Heh heh...now that's a funny thought!
Rand (in his room): ...The power of the Great Bird remains in Wyndia. If we were to obtain it, we could reach the Cathedral easily.
QuoteInteresting character moment, here. Rand seems to know about the Great Bird ritual... But he seems hesitant to suggest it anywhere but in private. I wonder why that is?
Nina: Ryu...I'd like to speak with you in my room. I'm not sure the others need to hear this yet...
Nina: ...I know where to find the power of the Great Bird. It's possible I will be able to wield that power myself. With that power,I could carry you all to the Cathedral. However... ...I've made up my mind. I will obtain the power of the Great Bird. Take us to Wyndia, Ryu. I must speak with my father.
QuoteIt's a good thing, for all our sakes, that Ryusui didn't translate this as "Big Bird".
-
PARTY CHAT (Mist Valley is blocked!):
Bosch: Do you know how to get to Heaven Tower from here?
Rand: South of Mist Valley is some hick town full of hick people. One of them finally got sick of the place and left. Dunno what happened after that.
Sten: Once we pass through Mist Valley, we'll find ourselves in Farma... Isn't that where Master Rand hails from?
QuoteReminder that Ryusui was translating Party Chat without context. It's hard to tell if Rand was trying to hide something or not.
Lin: Funny... Ever notice how Rand's teeth start chattering around Mist Valley?
Nina: If I didn't know better, I'd say that the fog around Mist Valley is the product of some very strong magic...
Tapeta: Fog fog fog fog fooooooog... What do you think? I call it "Theme of Mist Valley". The lyrics require some work, but is it not an enchanting melody?
Aspara: I have never traveled south of the Sea of Green before. I am quite interested in seeing what lies in that direction...
Deis (in the lobby): I'm sick of sitting around and thinking. Let's get a move on!
-
16 hours ago, AnonymousSpeed said:
Do people still do segmented speedruns? I would be interested to see where they do so.
Not as far as I'm aware, unfortunately. Sorry...
Anyway, y'all ready for X2? The game that took everything good about X1, and ramped it up even higher? Then come! Step into a new adventure!

Part 1: Mega Man X2 (100% Guide)—Opening & Wire Sponge (All Trophies/Achievements)
BASIC INFO:
1) I'm playing the plain SNES version, so I'll be using captions to mark what achievements I would've won, had I been playing on the Legacy Collection version.
2) The X-Buster's been re-worked from X1. Basic shots do 3 Damage, Dash Shots do 5, LVL 2 (green) shots do 5, and LVL 3 (blue) shots do 8. Bosses take lessened damage from all these.
3) Enemy HP has been streamlined since X1. Regular enemies will always take the damage listed above from the X-Buster (rather than the LVL 3 Shots doing less to some than others).
4) Regular enemies now have weakness weapons, just like bosses do. More on this in Part 2.
5) Enemies will not usually drop health AND ammo. They will usually drop one or the other.ACHIEVEMENTS SO FAR:
1) "Size Matters Not"—Beat the opening stage without taking damage.ENEMY LIST (Opening):
Cannon Driver (no legs): 10 HP [Drops health]
Bar Wayings (gates): 27 HP [Does not drop health or ammo]
Scrivers (screwdrivers): 4 HP [Drops health]
Scramblers (helicopter guys): 1 HP [Drops health]
Slidame (wall guy): 4 HP [Drops health]ENEMY LIST (Wire Sponge):
Croak Hoppers (frogs): 12 HP [Drops health & health]
Weather Balls: 64 HP [Does not drop health or health]
Sole Solars (cannons on poles): 8 HP [Does not drop health or health]
Scrivers (screwdrivers): 4 HP [Drops health]
Sky Farmers [Drops stuff): 4 HP [Drops health]
Sabbotein (electrified vine): 21 HP [Drops health]
Rightrod (lightning rods): 1 HP [Drops health]
Aclanda (scorpion): 48 HP [Drops health]BOSSES:
Gigantic Mechaniloid CF-0:
HP: 32 (Takes as much damage per shot as a normal enemy)
Damage: 2 (Contact)
Invincibility Frames: ~0.97 seconds' worthWire Sponge stats:
HP: 32
Damage (normal): 2 (Vines), 2 (Strike Chain), 2 (Lightning), 5 (contact)
Damage (electrified): 2 (Vines), 4 (Strike Chain), 7 (contact)
Invincibility Frames: ~0.97 seconds' worthWire Sponge A.I.:
1) Switches to different attack when you move to the other side.
2) The ceiling attack ends when 4 vines are on the ground, or when he's thrown 7.
3) His desperation move starts when he is under 10 HP, and then electrifies his attacks.THE SQUARE CUBE LAW (provided by Skaizo):

-
I actually wasn't sure whether or not to post this... But after making the first X2 episode, I realized that the walkthrough route's going to be a little different from the speedrun route. So, here you go. Consider this a prelude to what you might expect, or pass it so you don't get spoiled on the levels. I leave it to you...

Mega Man X2—100% Speedrun with All Achievements/Trophies (43:44.256)
NOTE: I made the thumbnail this time, reusing some of the elements Vrime used for X1. The frame counter and "Power button pressed" message is there to let verifiers know that I'm not playing back a movie file. This was recorded all in one sitting, no save states used. Will link it on the Leaderboards when it's approved.
-
Your Rand not high enough level for the Paladin? Then see how to get 'em from LVL 6 to LVL 18 in under 15 minutes!

Bonus #6: Breath of Fire II Walkthrough—Rand Grind at the Island of Giants
RAND GRIND CHECKLIST:
1) Recruit Deis (See the video for how).
2) Make a party with Deis & Super Sten.
3) Swim down (and left as needed) from HomeTown/Newhaven to find the Island of Giants.
4) Grind Rand to LVL 18 via the following strats:
—Atomic Goo: Death
—Chorking/Tyorkin: Battle item, Chop-Chop/Slice, or Dragon.
—Anything Else: SwitchENEMY AI:
A.Sludges/Atomic Goos (No resistance to status ailments; Will always outspeed if no grinding)
1/64 defend
Otherwise, 8.0 with probability 17/256 (if over 50% HP), 33/256 (if over 25% and at most 50%), 65/256 (if over 12.5% and at most 25%), or 129/256 (if 12.5% HP or under)
Otherwise AttackChorkings/Tyorkins (Immune to spell-casting, but weak to Wind):
1/64 defend
Otherwise, Attack or Cast a Spell
Spell list: Poison Breath & Zombie BreathGatlingheads (Immune to status ailments; Will always outspeed if no grinding):
Use Cure 4/Restore when under 75% HP (heals up to full no matter what)
Otherwise, 1/64 defend
Otherwise, Attack (75%) or Iceblast (25%)K.Sludges/Goo Kings (Immune to status ailments; Perfect accuracy with Death; Will always outspeed unless Deis is LVL 74):
1/64 defend
Otherwise, Death with probability 17/256 (if over 50% HP), 33/256 (if over 25% and at most 50%), 65/256 (if over 12.5% and at most 25%), or 129/256 (if 12.5% HP or under)
Otherwise Attack -
20 hours ago, AnonymousSpeed said:
"The timing for the hadouken is rather generous"
>cannot do the hadoukenUgh... I really should be careful saying stuff like that. Hmm... Well, so long as the input display is up, I suppose you still have a reference.
20 hours ago, AnonymousSpeed said:Pretty cool video. Some very neat glitches showcased, and the hadouken finishes were very satisfying.
Thx! Mega Man X2 will be up shortly, so look forward to more strats and glitches there!
Mega Man X is Ready to Rock! 100% Guide (w/Achievements) for the series!
in Let's Play/Streams
Posted · Edited by FionordeQuester
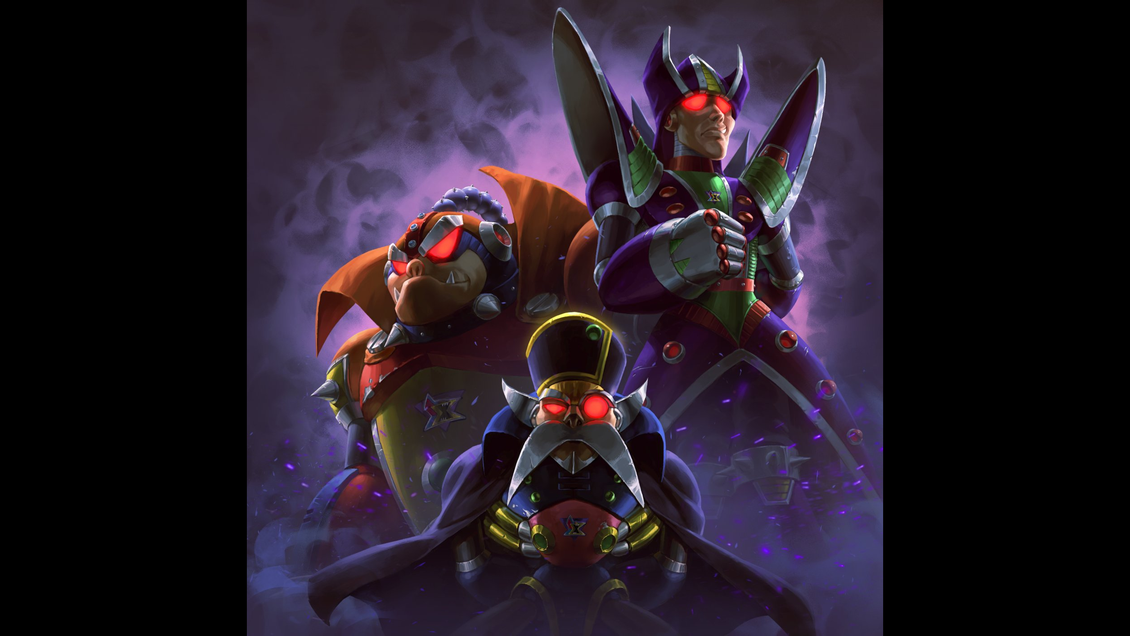
Hello everyone! Ready to slay ALL the X-Hunters once and for all?! Inside the North Pole, no less? Then come! Meet us for Round 2! X vs. the X-Hunters!
Part 5: Mega Man X2 (100% Guide)—X-Hunters, Round 2 (Fortress Stages—All Trophies)
CORRECTION ON THE SHORYUKEN:
I misspoke on the 1st input method. It's "Forward, Down, Forward", not "Down, Down, Forward".
SIDE-BY-SIDE COMPARISON OF ALL X-HUNTER DIALOGUE:
I figured this'd help give a clearer picture of what I was talking about. Hope you enjoy!
https://lpix.org/sslptest/index.php?id=158790
ABOUT THE FRAME RATE:
You must set Youtube to 720p for it to display the SNES' full frame rate. Otherwise, some effects won't render properly.
SHORYUKEN INPUTS (1 DMG on contact, then 8 DMG every 2 frames):
1) Forward + Down + Forward + Shoot (easier method—Forward Shoryuken)
2) 180 spin forward, down, then backward on your D-pad (harder method—Backward Shoryuken)
ACHIEVEMENTS SO FAR:
1) "Size Matters Not"—Beat the opening stage without taking damage.
2) "Take Your Time"—Let Morph Moth transform without hitting him.
3) "Dodge This!"—Kill 1 of 8 starting Mavericks with Giga Crush.
4) "Friendly Neighborhood Mega Man"—Charged Junk Shot to get items in 1 of 3 secret areas (located in Bubble Crab, Overdrive Ostrich, & Crystal Snail)
5) "Covert Ops"—Dodge all the spotlights AND beat up Magna Centipede *on the same visit*!
—Yes: That means it's unobtainable once you destroy him.
6) "Second Armor"—Complete the armor!
7) "Attack Me if You Dare"—Collect the Shoryuken!
😎 "Half the Sponge He Used to Be"—Kill Sponge with an *uncharged* Sonic Slicer!
—The charge version will *not* trigger his unique death animation!
CRYSTAL SNAIL QUICK KILL EXPLAINED:
Holding the Shoot button RIGHT as his health fills makes the buster shot automatic—it will fire on the very first frame it can, even though you started holding the button beforehand. It will also start a charge, as well.
Hence, Snail gets stunned, and you Dash, Pause while doing so, hover the cursor over Magnet Mine, and buffer the Mine shot by releasing the Shoot button (X was charging as you went into Pause).
This stuns him for longer, and lets you get that Shoryuken off. For some reason, that destroys his shell, so he'll just hop onto where it's supposed to be, again and again.
BOSSES:
Neo Violen stats:
HP: 32 (Weak to Bubble Splash—Immune to all other Maverick weapons)
Damage: 2 (Scatter Shot), 3 (contact), 6 (Macetail)
Invincibility Frames: ~0.97 seconds' worth (Giga Crush=2 Damage)
Neo Violen A.I.:
1) Spawns three sets of platforms in a fixed pattern, and loops back to the start at the end.
2) Leans head back=Forward swing. Looks to the side=Overhead swing.
Serges Tank stats:
HP: 32 (The cannons are weak to the industrial weapons—Serges himself is weak to Sonic Slicer)
Damage: 3 (All Projectiles), 4 (contact)
Invincibility Frames: ~0.97 seconds' worth (Giga Crush=2 Damage)
Serges Tank A.I.:
1) Phase 1 will advance forward after each cannon you destroy.
2) Phase 2 will always stop on the opposite side of the screen. If you're up, Serges goes down. If you go down, Serges goes up (this is why the platform trick works so well for dodging his attacks)!
Neo Agile stats:
HP: 32 (Weak to Magnet Mine—Immune to all other Maverick weapons)
Damage: 2 (Electro Orbs), 4 contact), 4 (Spikes), 6 (Missiles)
Invincibility Frames: ~0.97 seconds' worth (Giga Crush=2 Damage)
Neo Agile A.I.:
1) EDIT: You can sometimes stand in the black gaps, but only if the platforms fall in a certain way before the camera scrolls up.